Chopped: Post Punk Kitchen Version

What is this mystery dish?  Whatever it is, it is homemade, vegan, and taste quite good!

What is this mystery dish?
Whatever it is, it is homemade, vegan, and tastes quite good!

Isa, the vegan goddess of The Post Punk Kitchen, decided to hold a competition a la the television program Chopped.  (I had to look up the show on Hulu to see what it was. I watched an episode.  I rooted for the underdog and he won.)  Isa listed four ingredients and the direction to make some sort of entree, taking no more than 40 minutes to prepare, using those four ingredients.

The ingredients for this project are:

  • Black Berries
  • Fresh Mint
  • Black-Eyed Peas
  • Bittersweet Chocolate

I waffled back and forth about whether or not to try making something, but I drove past the grocery store yesterday and figured; why not?

So, here we have the first recipe that I “invented” all on my own.  I’ve modified many recipes, but they were always heavily based on the recipe as written.  This was pretty much all me.

When I hear “chocolate” and “entree,” pretty much all I can think of is a chocolate mole.  I still remember the first time I had a real chocolate mole sauce.  It was in Mexico, in the southern state of Yucatán.  I was living there at the time, and my host mom enjoyed preparing “comida típica” for me to eat, typical Yucatecan food.  Mole is most popular around the state of Oaxaca, I believe, but also eaten all throughout Mexico.  It was sweet and smooth and complex.  I really had no idea what was in it.  One day my host mom  tried explaining to me what was in the mole: seeds, nuts, spices, chiles, dried fruit, and I don’t know what else.  It sounded so complicated and difficult to make, so instead of trying to understand, I just ate spoonfuls of wonderful Yucatecan mole over rice.  I had a lot of favorite meals in Yucatán, but mole was definitely one of them.

So, mole is what I decided to make.  But, not just any mole, blackberry mole.  I was debating whether to make seitan to drown in the mole, but decided that the black-eyed peas would be enough.  Instead of making the typical rice to go with the mole, I chose to mix it up and make quinoa.  That left me with the mint… Cilantro lime rice is good.  And cilantro is sort of a little bit kind of like mint (they’re both green herbs, at least).  So, I decided to give mint lime quinoa a try.

Blackberry Mole with Mint Lime Quinoa

Ingredients (Mint Lime Quinoa):

  • 1 cup quinoa
  • 1 cup water
  • 1/4 scant cup mint leaves (finely chopped)
  • juice of 1 lime
Ingredients for Mint Lime Quinoa

Ingredients for Mint Lime Quinoa
(Yes, I know there are two limes here even though I said to use only one. Save the other for later.
Or maybe squeeze it to make yourself a nice refreshing limeade.)

Rinse the quinoa.  Put it into a pot with water and mint leaves.  Bring the quinoa to a boil.  Then, put the lid on the pot and turn the temperature down to a low simmer.  Simmer for 25 minutes.  Turn the burner off but let the pot sit with the lid on for 10 more minutes.  When the quinoa is done, fluff it around and mix in the lime juice.  Set aside until read to eat.

(It always amazes me that it’s cheaper to buy a whole plant, than just to buy a small container of herbs.  So, now I have a whole mint plant.  Who know what minty things I will make next!)

Ingredients (Blackberry Mole):

  • 3 tablespoons chopped almond
  • 3 tablespoons pepitas
  • 2 tablespoons sesame seeds
  • 1/2 teaspoon cinnamon
  • 1/2 teaspoon cumin
  • 1/4 teaspoon ground cloves
  • 6 tortilla chips
  • 1/2 diced onion
  • 2 cloves minced garlic
  • 1 minced jalepeño (seeded)
  • 2 chopped dates
  • 2/3 cup blackberries (divided)
  • 1 cup diced tomatos
  • 1 cup vegetable broth
  • 1 can black-eyed peas
  • 1/4 cup plus 2 heaping tablespoons bittersweet chocolate chips
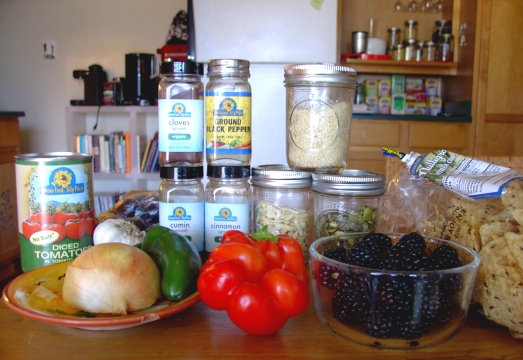
Ingredients for Blackberry Molé

Ingredients for Blackberry Mole
(with unused ground black pepper and an unused red pepper and, and missing vegetable broth and chocolate)

While the quinoa is simmering quietly on the stove, start working on the delicious blackberry mole sauce.

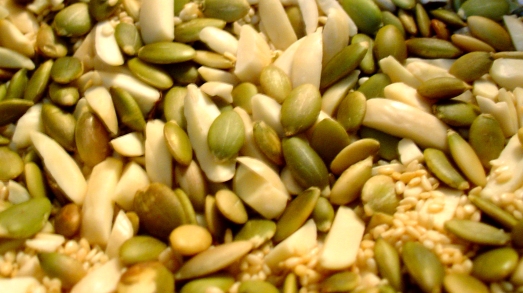
Toast the almonds, sesame seeds, and pepitas on the stove for a few minutes, until they begin to to turn golden.  (Be careful – the pepitas might start popping!)

Toasted almonds, pepitas, and sesame seeds

Toasted almonds, pepitas, and sesame seeds

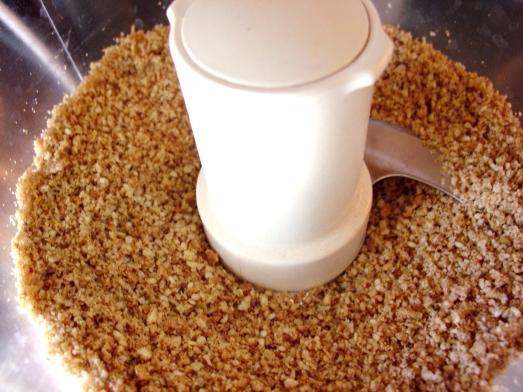
After they are toasted, toss the almonds, sesame seeds, pepitas, spices, and tortilla chips into a food processor (or Magic Bullet).  Blend until they are crumbs.

Powdered almonds, pepitas, sesame seeds, tortilla chips, and spices

Powdered almonds, pepitas, sesame seeds, tortilla chips, and spices

(I probably should have blended a bit longer, making it a bit more powdery.)

While the nuts and seeds are toasting (or after), sauté the onions and garlic in one tablespoon of olive oil for about 5 minutes over medium heat.  Then, add the jalapeños, dates, and 1/3 cup of blackberries.  Sauté for about 4 or 5 more minutes.

Pour the blended mixture of almonds, seeds, spices, and tortilla chips into the pan.  Stir for about a minute, to coat.
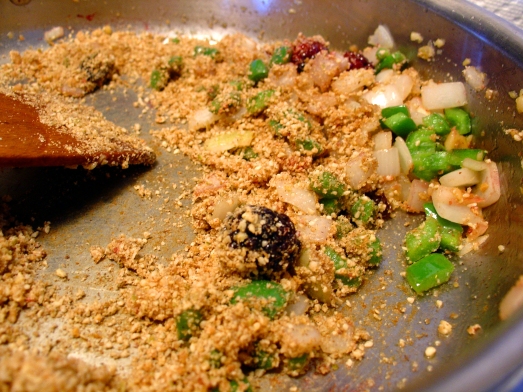
Sauteed onion, garlic, jalapeño, and dates, with the powdered dry ingredients

Sauteed onion, garlic, jalapeño, and dates, with the powdered dry ingredients.
This is when I really started to get worried. What was I doing?!

Pour the vegetable broth and the diced tomatoes into the pan and stir.  Simmer for about 10 minutes.
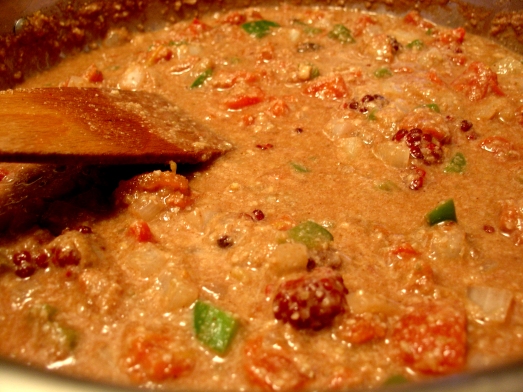
Wet ingredients added to the sauteed and dry ingredients

Wet ingredients added to the sauteed and dry ingredients.
And more worry. This certainly doesn’t look like mole as I remember it…

Blend the mixture into a smooth paste.  If you have an immersion blender, I suppose you could use that.  If you have a food processor, you could use that, but it might take a while.  I gave up with my food processor after a while and went to my beloved Magic Bullet.  (That machine can pulverize anything!)
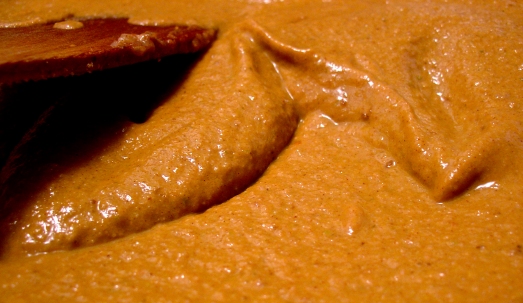
Molé post-blending

Mole post-blending.
Ahh… After pulverizing everything, it was starting to look a bit like the mole I remembered.

Finally, I had smooth, smooth almost-mole sauce.

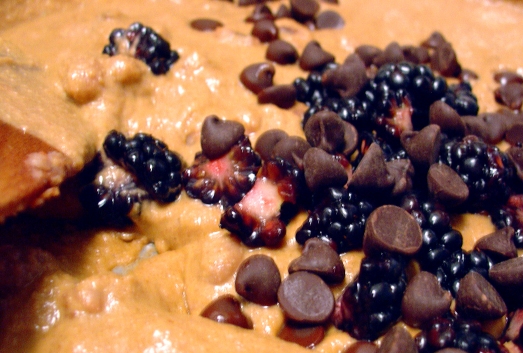
Pour the sauce back into the pan and put back over low heat.  Drain and rinse the black-eyed peas and add them to the sauce until everything is warmed up.  Lower the heat to very very low and stir in the semisweet chocolate and remaining 1/3 cup of quartered blackberries until the chocolate is completely incorporated.

Final additions to the molé; bittersweet chocolate and some more blackberries

Final additions to the mole; bittersweet chocolate and some more blackberries

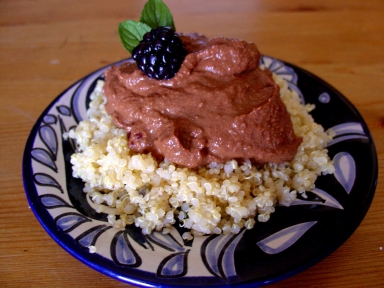
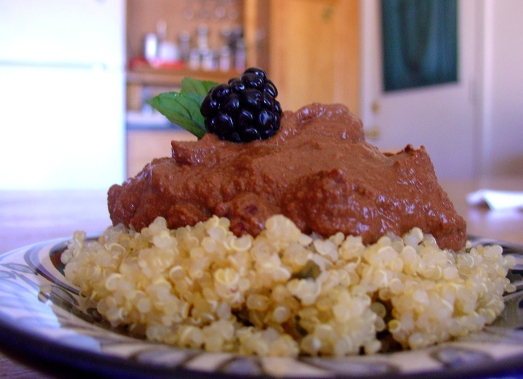
Serve the delicious blackberry chocolate mole over the mint lime quinoa.  Breath in the heavenly sent of chocolate and spices.  Enjoy.

Blackberry Molé sitting on a bed of Mint Lime Quinoa

Blackberry Mole sitting on a bed of Mint Lime Quinoa

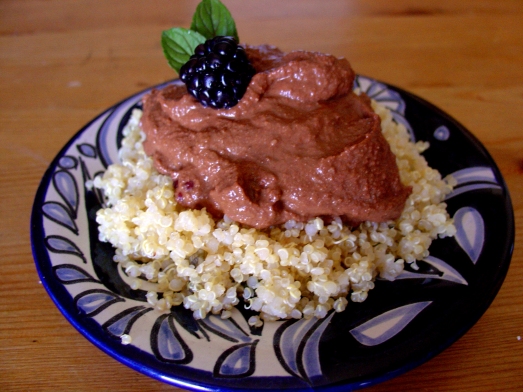
Get seconds, and enjoy again.

Blackberry Molé sitting on a bed of Mint Lime Quinoa

Blackberry Mole sitting on a bed of Mint Lime Quinoa

So, there you have it.  My first independent recipe.  And it actually worked!  The blackberry mole tasted like mole!  And the blackberry mole went oddly well with the mint lime quinoa.  Success!!

How to Eat an Entire Block of Tofu in One Sitting.

I had a block of tofu that was a month or so past its expiration date, and decided I should do something with it.  (Those dates are just suggestions, right?)

I wanted to eat something nice and breakfasty for breakfast, so I decided to make a tofu scramble.  I followed the directions for the basic tofu scramble at the Post Punk Kitchen.  I didn’t put any other vegetables in with the tofu (because I don’t have any), but I did include all the spices.

It was easy, quick, and pretty fool-proof.  Next time, I will put way less salt in, if I add any at all.  The scramble tasted very salty with one teaspoon of salt added.  I’d go with 1/4 teaspoon, or less.

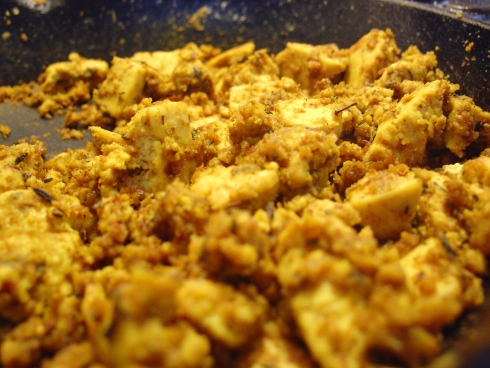
Tofu Scramble

Tofu Scramble

Even though it was a tad too salty, I ate it.  I ate it with a fierce hunger.

I ate the whole thing.  By myself.  The recipe says that the tofu scramble is four servings.

I say, instead of being called a “tofu scramble,” this should be called “how to eat an entire block of tofu in one sitting.”

And the Pumpkin Continues. This Time in Cinnamon Roll Form.

Last night I was wandering through links upon links and somehow came across a four year old recipe for pumpkin cinnamon rolls.  It was posted during 2007’s VeganMoFo, was written clearly enough for me to understand, and contained pumpkin.  (Also, the name of the blog that it comes from is Don’t Eat Off The Sidewalk.  I really like that title, because sometimes I’m temped to eat off the sidewalk, so a reminder is always good.)

I have never made cinnamon rolls, and when I looked around the internet, everyone talked about how long it took.  Today is my first day off work for Winter Vacation, so I decided to wake up early and give these pumpkin cinnamon rolls a try.

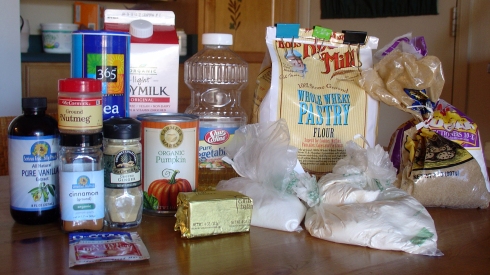
Cinnamon Rolls - Ingredients

Cinnamon Rolls - Ingredients

(It took me until several hours into the process to figure out that my bag of sugar had a tiny little hole, and that is why there were puddles of sugar all over my kitchen.  Messy.)

One of the few things I changed from the original recipe is that, instead of 2.5 cups of all purpose flour, I used 1.5 cups of all purpose and 1 cup of whole wheat pastry flour.

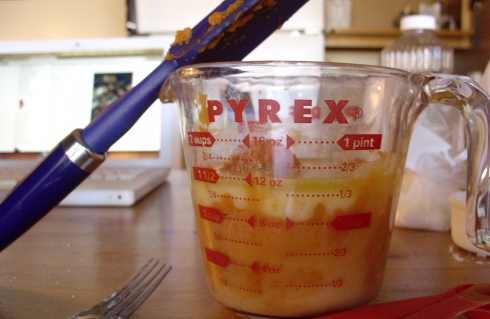
Pumpkin Mush

Pumpkin Mush

I mixed the pumpkin, sugar, melted Earth Balance, and soy milk together.  It looked kind of gross, but made it easier to pour into the yeasty water when it was time.

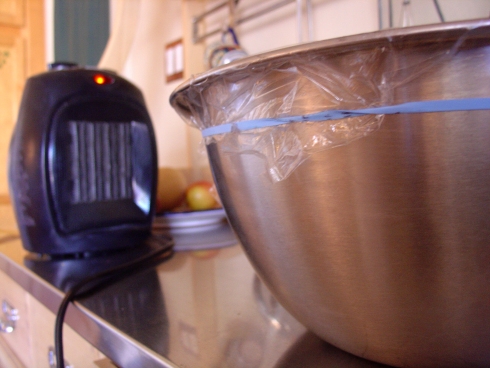
After I mixed all the ingredients and kneaded the dough, it was time to rise.  I had a problem, though.  Although I live in the desert, and it is blisteringly hot during the summer, in the winter the nights are quite cool.  My house retains the night’s cool temperatures really well.  So, even during the day it is a bit chilly inside.  It’s too cold in the kitchen for dough to rise.  So, I attempted a new plan:

Alternative Rising System

Alternative Rising System

I set the bowl of dough on the counter directly in front of the space heater.  I didn’t want it to get too close so that it would get too hot, but I needed it close enough that it would benefit from the heat.  I think it pretty much worked.

* * *          * * *          * * *

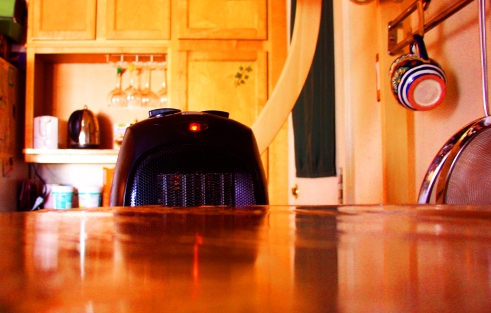
Unfortunately, the space heater came alive with an ominous glow.  It demanded that I give it the cinnamon rolls, or pay the price.  I refused, and we ended up at a stand-off.

Ominous Space Heater

Ominous Space Heater

I won the standoff by unplugging the space heater.

* * *          * * *          * * *

(I apologize for that strange interlude.  The photo of the space heater and the bowl of rising dough looked a bit evil at that direction.  So, I played with photoshop to make it look even more ominous. Oooooo.)

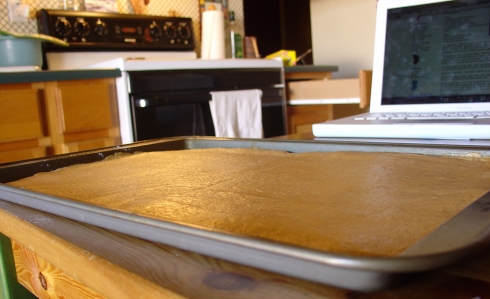
Okay.  So, anyway, I rolled out the dough.  The recipe said to roll it out to be 10×12 inches.  I used a cookie sheet, and just rolled it out to fill up the tray.  I don’t know what the size was.  Bigger than 10×12 inches, though.

Dough Rolled Out

Dough Rolled Out

(I have to say, I love the meta nature of this picture.  You can see the website with the recipe on my computer in the background of the photo.)

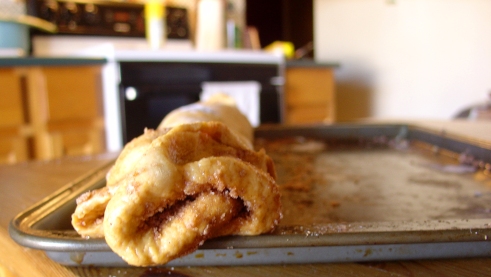
Then, I poured on the filling, and rolled it up.  (Or, I should say, tried to roll it up.  I had some issues at first, but eventually figured it out.)

Rolled End of Cinnamon Roll Dough

Rolled End of Cinnamon Roll Dough

On top of the recipe’s filling, I poured some chopped pecans.  I’m not sure how much…maybe 1/4 cup or so?

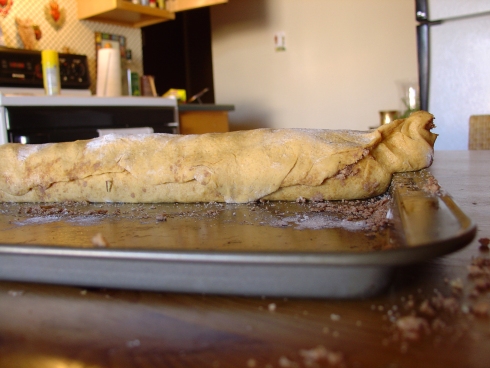
Front View of Rolled Cinnamon Rolls

Side View of Rolled Cinnamon Dough

You can see the escaped filling.  Oh well.

I cut it up, and crammed all 13 rolls it into an 8×8 the baking dish.  (The recipe called for a 9×9 vessel.)  After waiting for the cut rolls to rise some more, I stuck it in the oven.  Around half way through the baking, I sprinkled some more pecans on top of the cinnamon rolls.  It was about two tablespoons worth, or so.

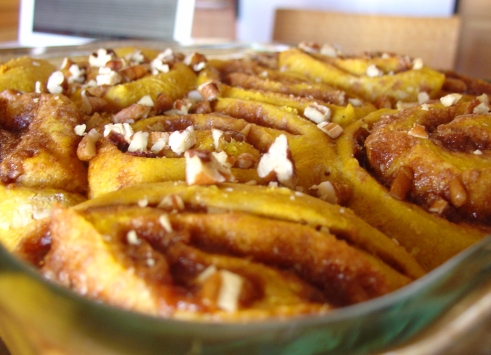
When they were glowing orange, and the sugar inside the rolls was melted and bubbly, I removed the baking dish from the oven.

Fresh Out of the Oven

Fresh Out of the Oven

Then, I prepared the icing for the top, and poured it on.

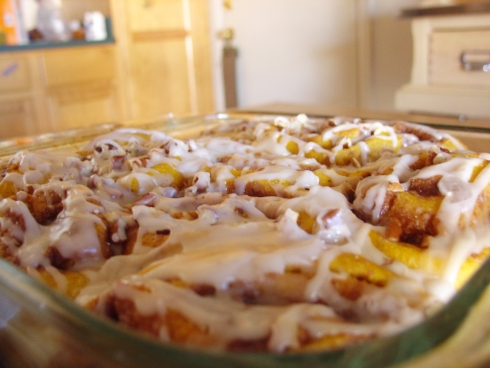
Beautiful Pumpkin Cinnamon Rolls

Beautiful Pumpkin Cinnamon Rolls

Look at them!  They look like cinnamon rolls!  (Imagine, that.)
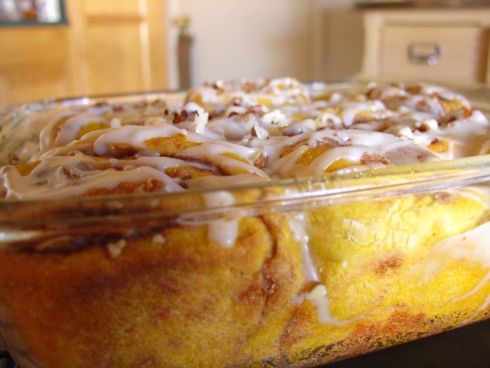
Gorgeous Pumpkin Cinnamon Rolls

Gorgeous Pumpkin Cinnamon Rolls

You can sort of see in this picture how bright and orange they are.  The pumpkin flavor is not very prominent, but it gives the cinnamon rolls a vivid and enticing pumpkin-orange color.  I love it!

These Pumpkin Cinnamon Rolls were a success.  Both because they ended up delicious, and because I finally learned how to spell cinnamon.  (For the first 3/4 of this post, I spelled cinnamon wrong every time.  And wrong in different ways, too!  I finally figured it out though.)

If I baked them again, I would increase the percentage of whole wheat pastry flour, and perhaps add a bit more pecans.  But, both of those are just superficial changes.  These are perfectly amazing as they are.  I’m hoping to freeze some of them (if I can stop eating them long enough to wrap and put in the freezer…)  That way, I’ll have amazing cinnamon rolls any time I want, without having to go through a three-hour long process.

What pumpkin concoction will I make next?  You’ll have to check back to find out…

Pumpkin Applesauce Cranberry Walnut Wheat-Germ Muffins

Contrary to what the title of this post might lead you to believe, I did not make five different kinds of muffin.  (That would just be crazy!)

So, here’s the thing.  I am obsessed with pumpkin.  Never before have I eaten much (or any) pumpkin, and I certainly have never cooked or baked with it.  But, ever since I made those Chocolate Pumpkin Muffins, I’ve had pumpkin on the brain.  I’m a few recipes behind on my blogging, but so far I believe I have made:

And now:

  • Pumpkin Applesauce Cranberry Walnut Wheat-Germ Muffins (adapted from Veganomicon)

Hmm…That’s a lot of pumpkin!

The original recipe in Veganomicon is for Banana-Wheat Germ Muffins.  But I didn’t want banana.  I wanted pumpkin.  (And yes, I know there are a zillion pumpkin muffin recipes out there that I could have followed, but I was attracted to the wheat germ, too.)  And, since the obsession has arisen, I have a well stocked cupboard full of (among other things) cans of pumpkin puree.  So I chose to modify the recipe as it was written, and turn it into Pumpkin Everything Muffins.  Here’s what I used:

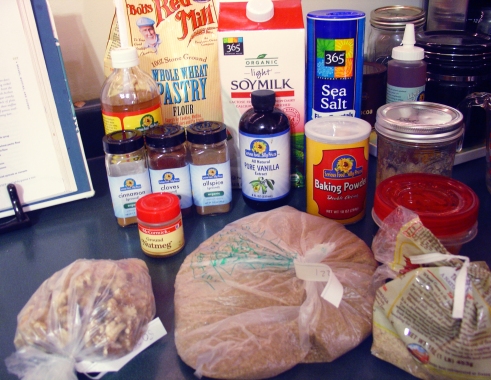
Pumpkin Everything Muffin Ingredients

Pumpkin Everything Muffin ingredients. (As you can see, I love Sunflower Market.)

  • 1 cup plain soy milk
  • 1 teaspoon apple-cider vinegar
  • *3/4 cup pumpkin puree
  • *1/3 cup natural applesauce (mine was homemade)
  • *1/3 cup turbinado sugar
  • 1 teaspoon vanilla
  • 1 1/4 cups whole wheat pastry flour
  • 3/4 cup wheat germ
  • 1 tablespoon ground cinnamon
  • *1 teaspoon ground ginger
  • *3/4 teaspoon ground nutmeg
  • *1/4 teaspoon ground cloves
  • 2 teaspoon baking powder
  • 1/2 teaspoon salt
  • *1/4 cup chopped toasted walnuts
  • *3/4 cup halved fresh cranberries

(*Ingredients with an asterisk are those that I changed or added to the original recipe.)

The main changes I made were to use pumpkin instead of banana, applesauce instead of oil, add pumpkin pie-like spices, and add nuts and cranberries.

For the directions, I pretty much followed the recipe book:

  1. I combined the soy milk and the vinegar, and let them curdle for a bit.
  2. Then, I turned the oven to 375 and put the walnuts in the oven to toast while it was heating up.
  3. While the milk was curdling and the walnuts were toasting, I mixed together all the dry ingredients.
  4. Then, I mixed together the wet ingredients, starting with the curdled milk.
  5. I took the walnuts out of the oven, and dumped them into the dry ingredients.
  6. I chopped the cranberries in halves and stirred them into the wet ingredients.
  7. I poured the dry ingredients into the wet ingredients and mixed as little as I could, so that the dry ingredients were mixed with the wet ones.
  8. Then, I oiled a muffin tin. I scooped a little less than 1/3 cup of batter into each of the muffin spots (except one – I ended up with 11 muffins instead of 12.)
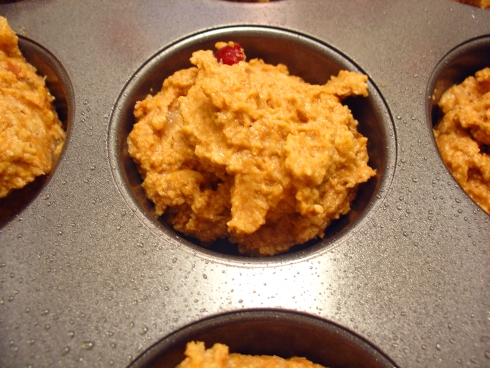
Pumpkin Everything Muffins, ready to go in the oven.

Pumpkin Everything Muffin batter, ready to go in the oven.

When I took the muffins out 27 minutes later, they were beautiful and very healthylicious looking.  (Healthylicious is a new portmanteau I just made up.  It means healthy and delicious, and comes from the same place in my brain as the word amazingfood.)

Pumpkin Everything Muffins, baked and ready to devour.

Pumpkin Everything Muffins, baked and ready to devour.

I was curious about the nutrition information for these muffins, so I submitted it to SparkRecipes.  According to that website (I don’t know if it’s correct or not), each muffin has:

  • 140 calories
  • 3 grams fat
  • 4.5 grams fiber
  • 4.5 grams protein

I’d say that’s pretty good for such a tiny Frankenstein(‘s Monster) of a homemade muffin.  These are muffins I can feel good about eating for breakfast.  (Or lunch.  Or dinner.  Or a snack.)

I’m excited(/worried) to see what other pumpkin-themed food I make next… I should stock up on cans while they’re on sale for the autumn/winter holiday season.

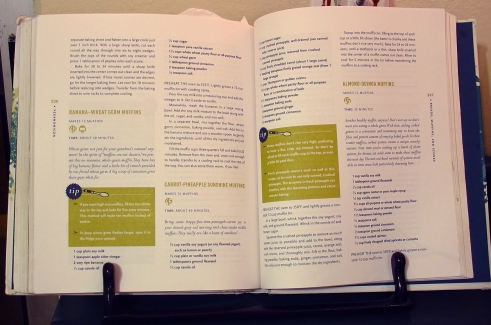
And, on a non-edible note, my awesome roommate got me a wonderful contraption.  A cookbook holder!  I no longer have to precariously balance cans of beans, jars of applesauce, or half-full mugs of tea on my cookbook pages to keep the book open.  The recipes are now clear and at eye-level in a lovely cast-iron cookbook holder.

Cookbook holder!

Cookbook holder, displaying Veganomicon's recipe for Banana-Wheat Germ Muffins.

Thanks to my roommate!

I’m in Vegan Tamale Shock!

Let me start with this statement: I love tamales.

(Hopefully that will serve to explain the existence of this long, rambling post.)

As with mole and pan dulce, the first time I can remember having eaten a tamale is August of 2006, in Mérida, Mexico.  In the state of Yucatán, (where the city of Mérida is located) tamales are slightly different than those you find at most Mexican restaurants in the US.  In Yucatán, traditional restaurants and cocina económicas (small restaurants or individuals who cook a different type of food each day of the week) sell a special variety of tamales, called vaporcitos.  Vaporcitos are cooked in banana leaves instead of corn husks, which give them a slightly different flavor.  Throughout my time in Mexico, Saturday was tamale day.  My host mom would go to a nearby cocina económica and bring me home two delicious tamales.  They were so flavorful and moist that I didn’t even add sauce to them, except for a little bit of super-spicy salsa de chile habanero.  (I should add that, during my semester in Mexico, I temporarily took a break from eating vegetarian, which I was at the time, so that my host family wouldn’t need to make me my own special meat-free food.)

Since then, I’ve tried vegetarian tamales at Mexican restaurants.  I never liked them much because they were drowned in sauces and cheese.  I did quite enjoy Trader Joe’s Cheese and Green Chile tamales, before I decided to start eating vegan.  However, these very cheesy tamales tasted nothing like the tamales I remembered from Mérida, which had been filled mostly of some sort of meat and sauce.

So, when I saw recipes for vegan tamales in Terry Hope Romero’s Viva Vegan, I was excited.  Not just a little bit excited, but very excited.  Very, very excited.

It took me a while to work up the cooking-confidence to give it a try, but that time finally came.

Of the several varieties she has recipes for, I chose to make the Red Chile-Seitan Tamales.  These tamales, she said in the book, would fairly closely resemble traditional red chile tamales.  Cooking the tamales actually required four different recipes, all from Viva Vegan.  First I made the Steamed Red Seitan (to act as the meaty filling).  Then I made the Red Chile Sauce.  Next, I prepared the Savory Vegan Masa Dough.  Last, I was ready to follow the directions for the tamales themselves.  It was a multi-day, many-hour process.  But in the end, I can unequivocally say that it was worth it.  These tamales may be the most delicious things I have ever eaten.

This post is going to be image-heavy, because tamales are beautiful.  Unfortunately (or perhaps fortunately, I’m not sure), I dropped my camera and ended up loosing some pictures.  (And, by dropped I actually mean: walked into the cord attaching it to the wall while the battery was charging and ended up flinging the camera across the room and onto the floor).  The camera still works (it is a hearty little camera – approaching its eight birthday), it’s just that some of the files became corrupted during the camera’s failed attempt at flight.

Okay, onto the tamales.

First, I made the Steamed Red Seitan.  While I had previously made seitan sausages, I had never just steamed a loaf of seitan to use in cooking.  I had bought the water-packed kind at the store a few times.  It was expensive.  I was ready to make my own.

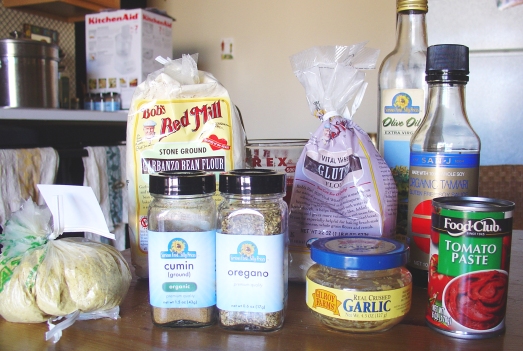
Steamed Red Seitan ingredients

Steamed Red Seitan ingredients.

The ingredients are fairly basic (if you already happen to have vital wheat gluten and garbanzo flour, as I did).

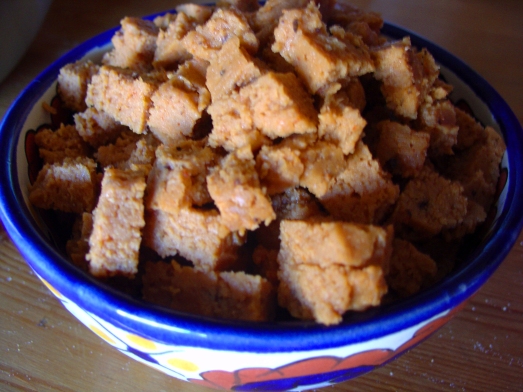
Cubed Steamed Red Seitan

Cubed Steamed Red Seitan.

After you mix it all together, knead it, wrap it in tinfoil, steam it, cool it, and cube it, it looks like any store-bought seitan!

Next, I made the Red Chile Sauce.

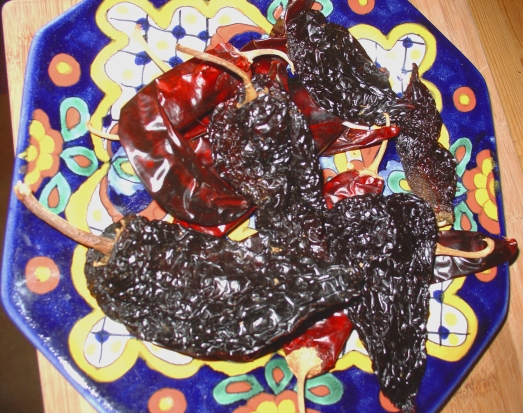
Dried ancho and guajillo chiles.

Dried ancho and guajillo chiles.

After removing the stems and deseeding the chiles, they were ready to be cooked together with onions, tomatoes, vegetable broth, and spices.

Red Chile Sauce, cooking.

Red Chile Sauce, cooking.

The next step was to puree the sauce.  Unfortunately, I did not heed the directions on my food processor, and filled the bowl much higher than the fill line.  There was sauce pouring out of every part of the food processor.  It was a pretty impressive mess, and I now know to not put liquids above the fill line on my food processor.

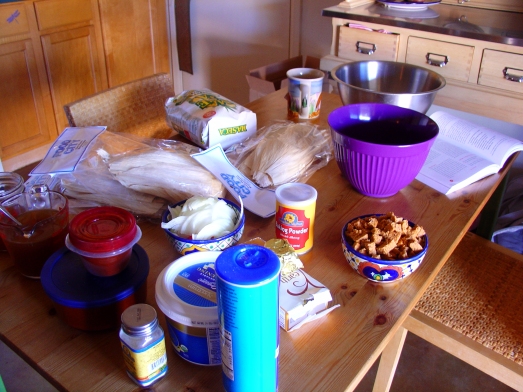
A few days later, I got ready to mix the masa and assemble the dough.  I was a little overwhelmed and basically just threw everything onto the table in a big mess of ingredients.

Tamale-making ingredients.

Tamale-making ingredients.

I have the broth, the vegetable shortening, the Earth Balance, the baking powder, the garlic powder, the salt, and the masa for the dough.  I have the sauce already made in the tupperware containers, and the seiten already made and cubed.  I have the onion and red peppers sliced and ready to saute for the filling.  I also have way too many corn husks.  (I wanted to be prepared!)  And, the most important part – the Viva Vegan cookbook!

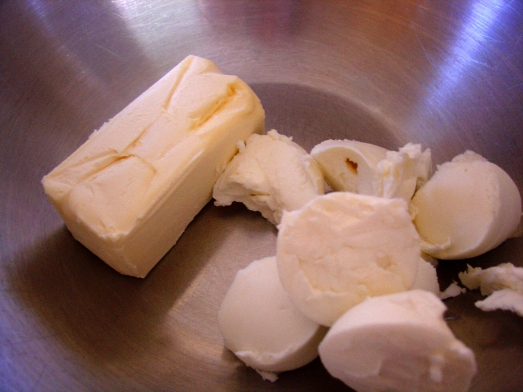
Earth Balance and vegetable shortening.

Earth Balance and vegetable shortening.

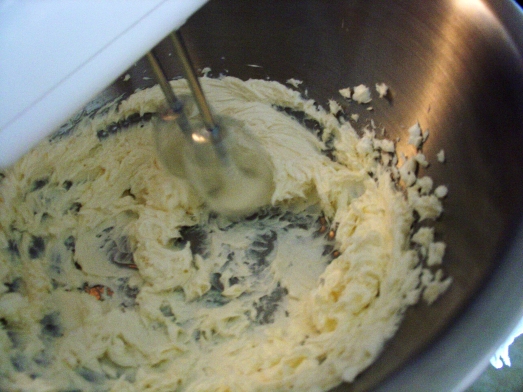
First, I started by creaming together the Earth Balance and the shortening.  Even though I use non-hydrogenated organic shortening, it still sort of grosses me out.  It’s just so greasy (which makes sense, since it’s oil…)

Creamed Earth Balance and vegetable shortening

Creamed Earth Balance and vegetable shortening.

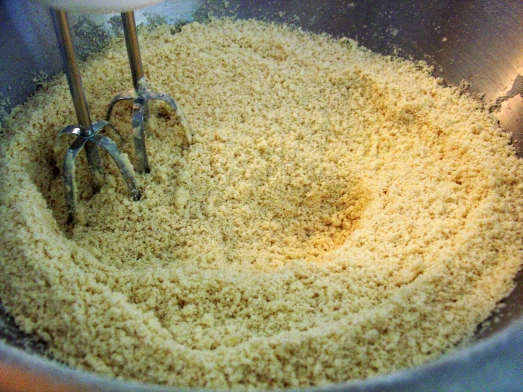
Then I added the dry ingredients to the creamed fat.

Dry Masa Dough

Dry masa dough.

After the dough reached a “sandy” consistency, I added the vegetable broth and mixed until smooth.

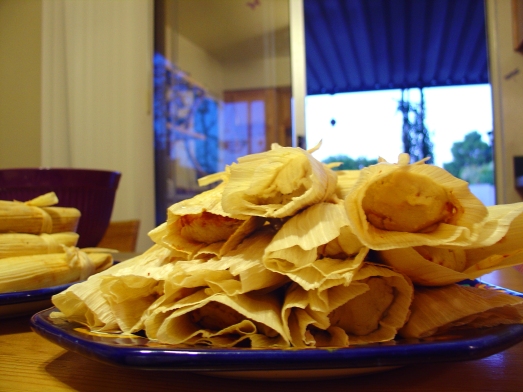
At this point, I had all the components ready.  All I had to do was assemble.  The assembly process was surprisingly easy, though it did take quite a while.  But it was enjoyable mindless work, and pleasant enough.  By the time I ran out of masa, I had 21 gorgeous tamales, wrapped in corn husks and tied shut with little strips of cornhusk.

Tamales, ready to be steamed.

Tamales, ready to be steamed.

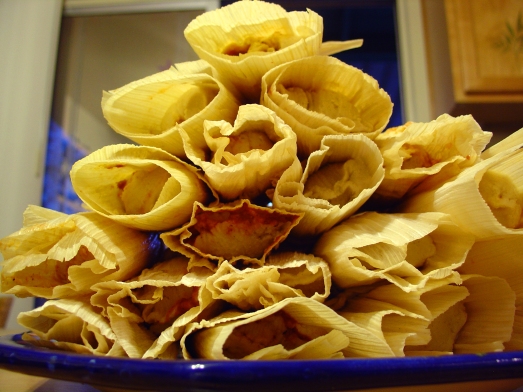
After I finished wrapping the first tamale, I was flabbergasted that it actually looked like a tamale! Like, the kind you’d buy from somewhere.  And I had just made it.  From scratch! A real, live, (well, not live since no animals were harmed in the making of these tamales) tamale!

Tower of tamales.

Tower of tamales.

I started snapping photographs left and right.  These tamales have been more photographed than most celebrities.

Then, I lined the steamer basket with extra corn husks, and piled the tamales in.

Tamales: Moments before steaming.

Tamales: Moments before steaming.

My 21 tamales just fit in the steamer.  I think it’s a good thing that I didn’t make 24 like the recipe stated I should – I don’t know that they all would have fit!

The next thing I knew, 65 minutes were up, and the tamales were ready to be removed from the heat.  Then, after another excruciating 15 minutes, they were ready to be eaten.

I took one out of the steamer basket and laid it on a plate.

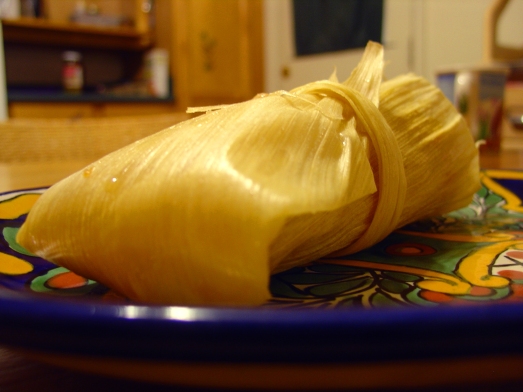
Tamale, still wrapped in corn husk.

Tamale, still wrapped in corn husk.

It still, surprisingly enough, looked like a tamale.

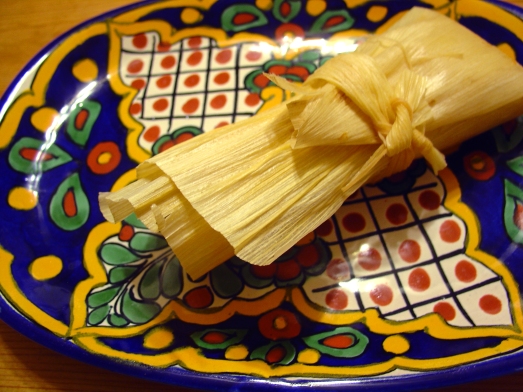
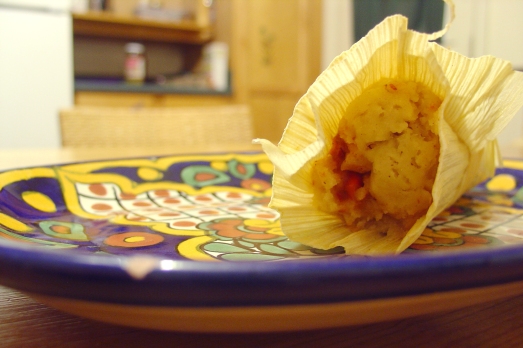
Wrapped Red-Chile Seitan Tamale.

Wrapped Red-Chile Seitan Tamale.

This tamale had a jaunty side-tied knot.

Wrapped Red-Chile Seitan Tamale, tunnel view.

Wrapped Red-Chile Seitan Tamale, tunnel view.

It’s like playing peek-a-boo with the tamale.  Or else, perhaps the tamale is going to jump out and attack.  I can hear the Jaws theme now… (Only, no shark would eat this tamale, because it’s meat-free!)

After all the dramatics of admiring the husk, I was ready to open it up and find out for certain if it had turned into a tamale.

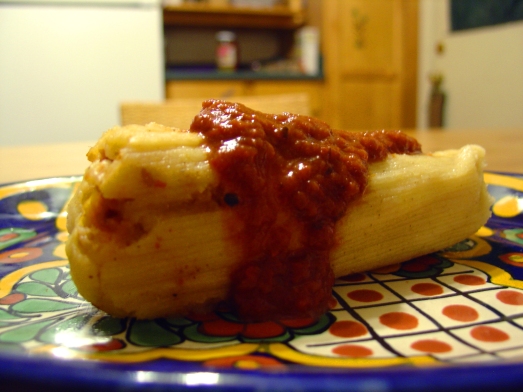
So, I cautiously opened it, and found inside, a perfectly formed tamale!  I poured on some more red chile sauce.

Perfect Red-Chile Seitan Tamale, angle one.

Perfect Red-Chile Seitan Tamale, angle one.

Amazing.

Perfect Red-Chile Seitan Tamale, angle two.

Perfect Red-Chile Seitan Tamale, angle two.

Fabulous.

So, at this point I knew that it looked like a tamale, and smelled like a tamale, but the biggest question was, did it taste like a tamale.

I will let this g-chat conversation, between me and my sister and occurring moments after I tasted my first tamale, answer that question:

Me: i just took a bite and it is SO GOOD. YUUUMMMMM
Sister: haha. nicee
Me: i want to eat all 21 RIGHT NOW.
Sister: you would not be happy
Me: no…i would not. but still. they taste like TAMALES!
Sister: good
Me: they taste like meaty tamales because of the seitan and spices. THEY ARE SO GOOD. i can’t believe it.
Sister: hah
Me: i’m in tamale shock. TAMALE SHOCK.
Sister: calm down. deep breaths
Me: i just finished the second one.
Sister: nicee
Me: i don’t ever want to eat anything else ever again. only these tamales.
20 minutes later…
Me: i just ate my third.

.

As you can see, I loved these tamales so much that apparently I forgot how to appropriately use capital letters. (And I’m a teacher. Teachers are always supposed to follow capital letter rules.)  While I was on a tamale high, my sister was substantially less impressed.  Of course, that’s only because she didn’t have any gloriously amazingly scrumptious vegan tamales to eat.

Overall, the tamales were quite a process.  They took a long time.  A long, long time.  They created a mess.  Quite a mess.  But they are delicious.  So, so, delicious.  They are sweet and meaty and saucy and masa-y and everything else that tamales should be.

I think the next tamales I make will be Chocolate Brownie Tamales.  I found the recipe on Terry’s (the author of Viva Vegan) website and they look great.  Chocolate and tamale?  They aren’t exactly traditional, and I never would have thought the two could be combined…but now that I know they can, I need to make them.  And I do have two extra bags of corn husks, along with most of a package of masa.  Look for pictures of these chocolate tamales within the next few weeks… I don’t think it will be long before these are made.

Thanksgiving Seitan Roast

I had been wandering around the Internet, looking for a good loaf-like thing to make for Thanksgiving.  I hadn’t found anything that looked good, and decided to just make tamales, instead.

Then, on Wednesday morning I woke up to find that Isa of The Post Punk Kitchen had cracked the magical code she’d been working on, apparently for 20 years, and had come up with a perfect seitan loaf to be filled with mushroom stuffing and baked in tinfoil.

In writing her recipe, she lamented that it was probably too late for most people to make for this year’s Thanksgiving.  But, I’m not most people, and I am a master of last-minute impulse cooking.  (It’s like impulse buying, but involves looking in the pantry instead of down the grocery store aisle.)

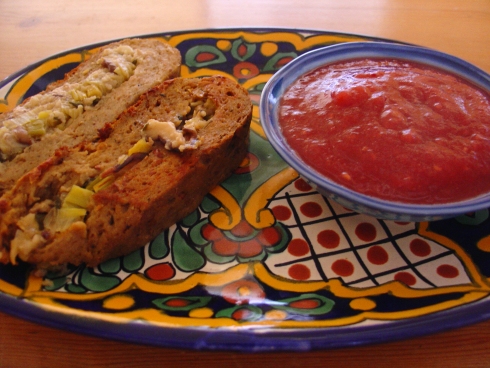
Seitan loaf

Seitan roast stuffed with shiitakes and leeks.

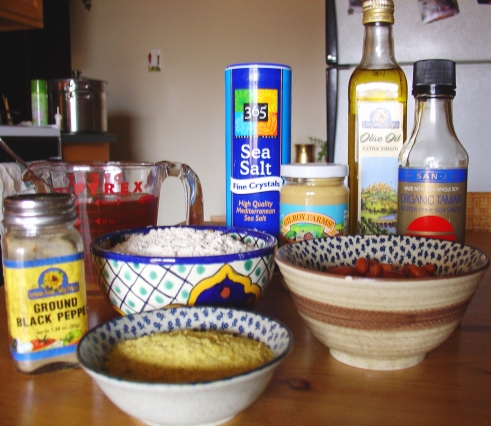
I started by prepping the ingredients:

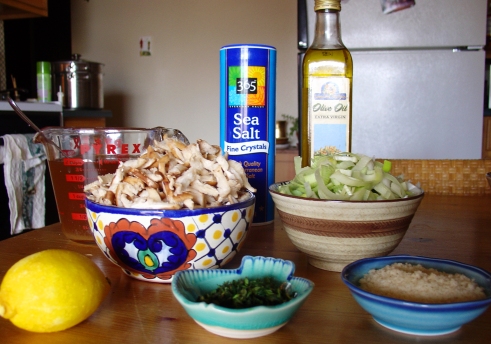
Seitan Loaf Stuffing Ingredients

Stuffing ingredients.

I had never used shiitake mushrooms or leeks before, so both of those were chopping adventures for me.  I have to admit that mushrooms creep me out a bit.  They’re just…weird looking.  And a little dirty, maybe?  I don’t know.  Regardless, I rinsed the mushroom, removed the stems, and sliced them.  Then, I sliced the shallots into half-moons as the recipe said to.  (I think I did, at least.)  The poor lemon had suffered through a fairly unsuccessful zesting earlier in the day, so it was starting to look a little pathetic by this time.  But, it was still up for a juicing for the stuffing.  I also struggled a bit with the thyme.  I don’t know if there’s a better way to remove the leaves from the stems than the one I used, but the leaves just kept sticking to my hands and fingers and it was driving me nuts.  Eventually, I got the required amount of thyme off the stems.  For the bread crumbs, I used panko, because that’s what I had.

Seitan Loaf Ingredients

Seitan loaf ingredients.

The loaf ingredients required no chopping or cutting, which was nice.  (Of course, if I actually used real garlic instead of the lazy garlic-from-a-jar, there would have been more to do than measure.)

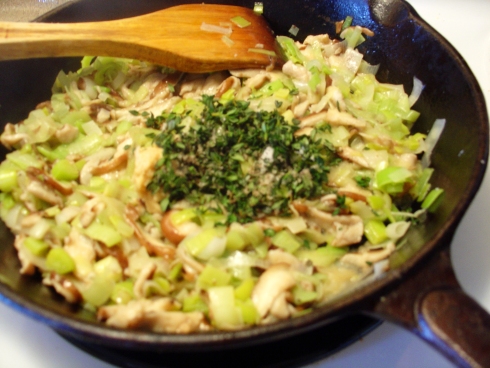
So, I started by making the stuffing.

Seitan loaf stuffing

Seitan loaf stuffing; mushrooms, leeks, and thyme.

Every time I sauté vegetables, I’m surprised by how much they reduce.  Every. Single. Time.

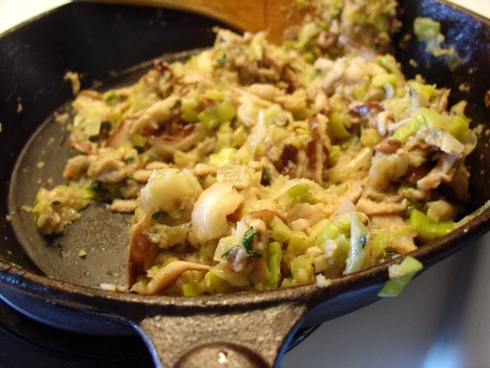
Completed seitan loaf stuffing

Seitan loaf stuffing: Completed.

I finished the stuffing and was pretty satisfied.  It smelled good, and I’d successfully cooked shiitakes and leeks for the first time.

I set the stuffing aside, and started with the seitan loaf.

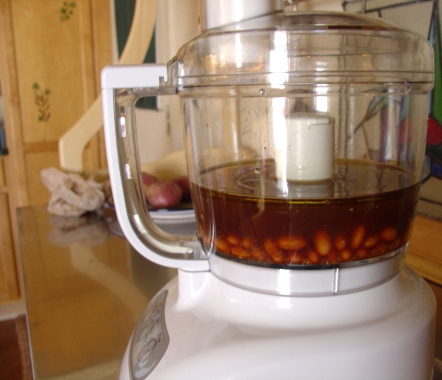
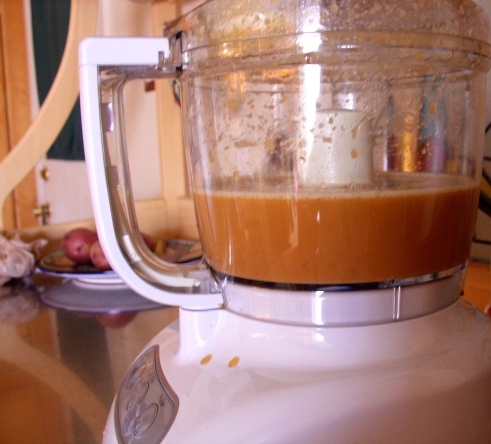
First I put the beans and broth (and assorted other ingredients) into the food processor.

Beans and broth in food processor

Beans and broth in the food processor.

This is only exciting because I just bought this food processor.  Previously, I did all my blending and processing in the Magic Bullet, which, while magic in many ways, is quite small.  Unfortunately, even though I followed the “don’t fill with liquid above this line” rule, the food processor still leaked liquid.

Beans and broth in food processor, processed

Slightly leaky, but the job got done.

Even with the leakiness, it was probably less messy than having to do this blending in two or three Magic Bullet cups.

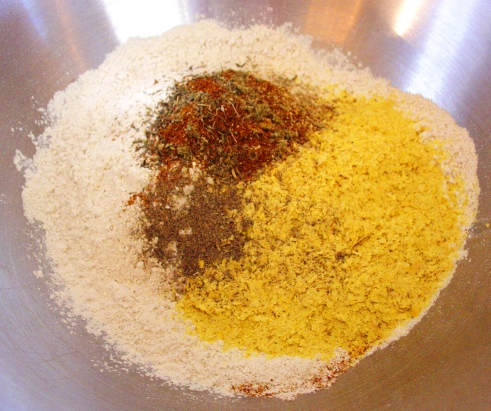
Next, I mixed the dry ingredients for the seitan.

Seitan loaf: dry ingredients

Seitan loaf: dry ingredients

I love looking at all the different spices together.  It makes me happy.  Spices (and herbs) make food delicious.  This is a fairly recent discovery for me.  (Also, while the Magic Bullet is too small for big food processing jobs, it is wonderful at chopping herbs, like fennel seed.)

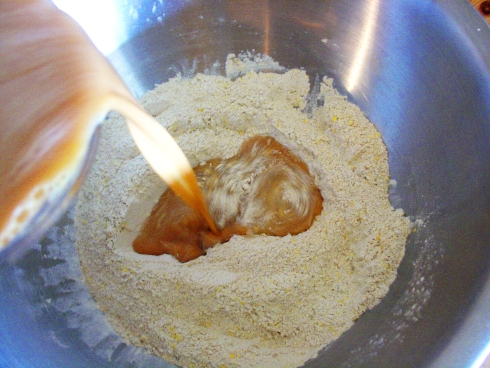
Then I slowly poured the wet ingredients into the dry ingredients.

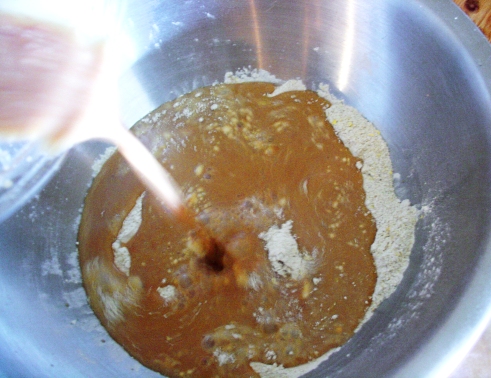
Pouring, one

Pouring wet ingredients into dry ingredients (action shot one).

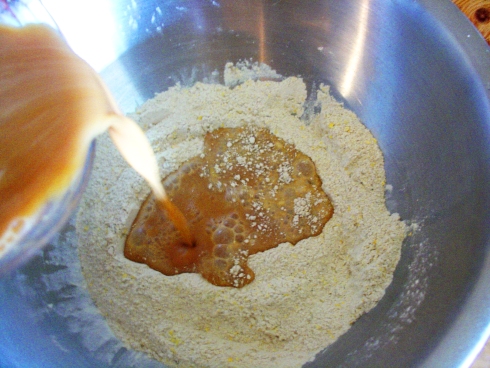
And I continued pouring.

Pouring, two

Pouring wet ingredients into dry ingredients (action shot two).

And I poured some more.

Pouring, three

Pouring wet ingredients into dry ingredients (action shot three).

The first time I used vital wheat gluten, I had no idea what would happen when it mixed with liquid.  I was in total shock when it got all thick and stretchy!  (Now though, I know what to expect.)

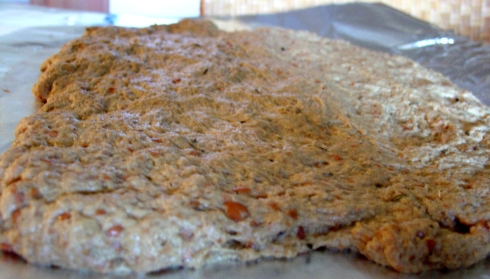
I kneaded the dough and stretched it out onto some tinfoil.

Seitan loaf: dough

Seitan loaf: dough.

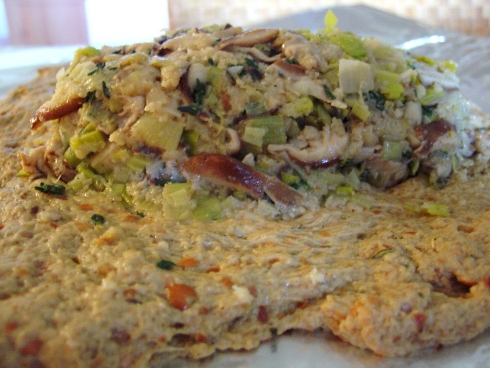
Then, I scooped the stuffing out of its pan and dropped it onto the seitan loaf dough.

Seitan loaf: stuffing on dough

I wasn't expecting the stuffing to be as moldable as it was.

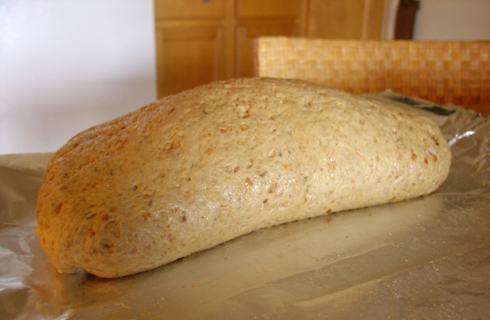
I rolled it all up.  This process was surprisingly easy!  I thought it would be messy and/or difficult, but I rolled it up without any problems.

Rolled and ready to bake.

Seitan loaf, rolled and ready to bake.

I baked it for 50 minutes like the recipe said, but when I peeked at it, it didn’t seem done yet, so I baked it for five more minutes.  I took it out of the oven again, let it cool for a while, and looked again.  It looked like the edges were starting to brown a bit like Isa’s pictures showed, but the middle still seemed pretty raw.  So, I put it in for about ten more minutes.  By this time, I think it was more done.  But, I’m not entirely sure.  Regardless, when I reheat the leftovers, I will be reheating it in the oven, so it will get a few more minutes of baking time then.

After making this (and the various other things I made that day), I was too tired to make any gravy.  But, I did eat the loaf together with an applesauce based fruity thing that I made.  The sweet fruit sauce made a good accompaniment to the seitan loaf.

Seitan Loaf: Final Product

Seitan loaf slices with mixed-fruit sauce.

All in all, it was pretty successful!  The people I shared Thanksgiving with were a little weary of this “weird” vegan food.  A couple people ventured to try a bite, but no one ate more than a few bites.  Whatever – that just means more leftovers for me!  It was pretty delicious and way more appetizing looking (not to mention healthier and with fewer preservatives or chemicals) than the creepy Tofurky loaves that you can buy at the store.  (Appologies to anyone who enjoys the Tofurky loaves.  I have never eaten one, but the picture on the box sort of grosses me out.  I don’t know why.)

I was really happy with how this turned out, and will definitely make it again for big food-centered events that require loaf-shaped food.

My ode to pan dulce

When I first became vegan, I was concerned about missing two things.

One, sort of obvious, was cheese.  I mean, cheese is kind of magical.  I had an obsession with string cheese.  There were some days when my consumption would reach three sticks of cheese.  I would buy these huge 48 packs of string cheese at the store and go through them quickly.  String cheese was the perfect portable protein source (love alliteration!).  It fit in a pocket, a purse, or a lunch bag.  I also loved to eat queso Oaxaca, which is closely related to string cheese/mozzarella cheese, but slightly different.  I first was introduced to it in Mexico, and found that you can buy it at any Mexican market here in the desert.  Aside from those cheeses, I also occasionally enjoyed a nice creamy goat cheese.  I guess my cheese love wasn’t wide, but it was deep.  However, interestingly enough, I haven’t craved cheese at all since I stopped eating dairy.  I also have absolutely no desire to try any of the vegan cheeses out there.  Any cheese-like concoction that I can create at home is good enough for me, right now.

However, in addition to the cheese, I was very concerned about missing Mexican pan dulce.  Pan dulce is an all-encompassing name for a wide variety of sweet Mexican pastries.  While there are a lot of different kinds of pan dulce, they are all bread-based, and they are all sweet (hence the name; pan=bread, dulce=sweet).  In many cases, the name of the pan dulce describes its appearance.   My favorite varieties of pan dulce were always las conchas (shells), las orejas (ears), and las banderillas (a dart stuck into a bull).  There is a panadería (bread store, or, Mexican bakery) near my work that I used to stop at every other Friday, or so.  I would buy three or four pieces of pan dulce, and eat them with hot chocolate or coffee throughout the weekend.  Just walking through the door of the panadería reminded me of my time living in Mexico, and the many wonderful panaderías there, ubiquitous on every major corner in the city.  Unlike bakeries in the United States, in Mexico you enter the panadería, you take a large metal tray and a set of tongs, and walk through the bakery smelling the breads and using the tongs to select what you want.  The panaderías in the US work the same way.  I’ve been to US panaderías in Chicago, Omaha, Rural Iowa, and Phoenix.  No matter where you go, there are the ever-present dented metal trays, the metal tongs, and the trays and trays of fresh, delicious, sweet-smelling Mexican pan dulce.  Sometimes, it’s a mystery as to what you’re buying.  The label might say that an empanada is filled with piña (pineapple), but when you take a bite, you discover that it’s actually filled with crema (sweet custard-like creme).  Whatever you end up eating, the pan dulce experience is always a sweet one. (Ha ha.  Get it?)

So, this is to say, that while cheese may have seemed like my biggest “sacrifice” when going vegan, in all actuality, it was really pan dulce.  The only times in four months that I have contemplated eating anything non-vegan were the occasional Friday afternoon as I was driving past the turn off to go to the panadería, or Monday mornings when I would go make photocopies at work, and be offered sweet pan dulce by the parents who volunteer at the school.  Cheese, I have never craved.  Pan dulce though, I’ve dreamed about.

So, I went on a search for vegan pan dulce.  No matter how I googled it, only one recipe appeared: Vegan Explosion’s Conchas.  This recipe was posted way back in 2008, but both the recipe and the photographs looked great.  So, I decided to give it a try.

I was so excited to finally eat pan dulce, for the first time in six months, that I measured out the dry ingredients the night before, so I could get right to work with the mixing and rising and making and baking and eating the next morning.

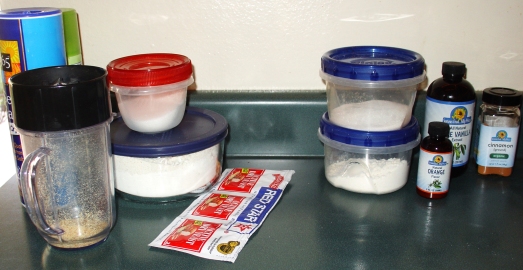
Pan Dulce - Pre-measured dry ingredients.

The ingredients on the left are for the dough, the ingredients on the right are for the topping.

I made a few modifications*, but mostly followed the recipe as posted on Vegan Explosion:

Ingredients for the dough:

  • 1 Tablespoon yeast
  • 2/3 cup water, warmed
  • 1/3 cup sugar
  • 1/3 cup non-hydrogenated vegan spread (like Earth Balance)
  • 1 teaspoon salt
  • 1 Tablespoon ground flaxseed + 3 Tablespoons water (since ground flaxseed goes bad so quickly, I always grind it myself in the Magic Bullet)
  • 2 1/2 cups AP flour
  • 1 cup whole wheat pastry flour
  • 1/2 cup lukewarm soymilk, warmed up and then cooled in the freezer for 3 minutes

To make the dough, I first dissolved the yeast in warm water, and mixed the ground flaxseed with water (these two mixings happen separately).  I allowed both to sit for a few minutes to do their thing.  (That is, the yeasties needed to wake up from their long slumber, and the flaxseed needed to get thick and gooey in the water.)  While the yeast and flax were busy at work, I warmed the soymilk on the stove.  Unfortunately, I got distracted and the soymilk burned and boiled over and made a mess.  I washed out the pot and tried again – the second time experiencing liquid-warming success.  As I put the soymilk in the freezer to cool, (I’m not sure what the reason for the warming and cooling are, but the recipe said to do this) I sifted together the flour, sugar, and salt, and poured in the Earth Balance, yeasty water, flaxseed mixture, and the now-cooled soymilk.  I mixed and kneaded everything until it was pretty smooth.  Then, I rolled it into a ball, put it on a piece of parchment paper, and covered it with an upside-down bowl.  I let it relax for about two hours.  (I would have done 1.5 hours, but my kitchen was pretty cold and I wanted to make sure it rose enough.)

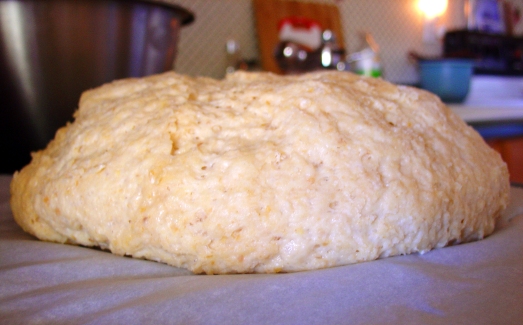
The dough that took over Manhattan.

The dough that took over the city. (Or my kitchen. Or maybe just that piece of parchment paper.)

Then, I punched down the dough, kneaded it a tiny bit, and rolled it into 12 balls which I put on two parchment-lined baking sheets.

Next, I prepared the topping.

Ingredients for the topping:
  • 1/3 cup sugar
  • 1/4 cup non-hydrogenated vegan spread (like Earth Balance)
  • 1/2 cup AP flour
  • 1 teaspoon cinnamon
  • 1/4 teaspoon vanilla extract
  • 1/3 teaspoon orange extract

I put the sugar, Earth Balance, and flour together in a bowl and mixed until they were well combined.  Then, I divided this mixture into three separate balls.  With one ball, I kneaded in the cinnamon until it was well incorporated.  With the next ball I kneaded in the vanilla until it seemed mixed in.  With the last ball I kneaded in the orange extract until it was well mixed.  (In the original recipe, it said to add a drop of red food coloring in with the orange flavored topping, but I didn’t have any food coloring, so my orange topping, like my vanilla topping, is white.  The cinnamon topping is brown.)

I divided each of the balls of topping into four tinier balls.  The original recipe said to put each ball between two sheets of plastic wrap, roll them flat under the plastic wrap, and then drape them over the balls of dough.  I, being too lazy to get out the plastic wrap and rolling pin, chose to just flatten each ball as best I could without having too much of the topping stick to my hands, and then draped these sort-of circles over the dough.  It was messy, but it worked out okay.

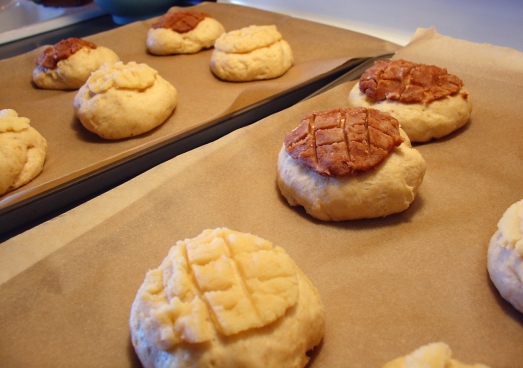
Finally, it was time to transform these from just balls of dough into real conchas.  I carefully used a knife to cut a shell pattern into the topping.  There are different ways to do it, but I just made three or four cuts in one direction, and then three or four more crossing over in the other direction.  Really, you can make any design or pattern you want.

I then covered the trays of dough and let them rise for another 40 minutes.

Pan dulce - risen and ready to go in the oven.

Pan dulce - risen and ready to go in the oven.

Then, into the oven for 15-17 minutes (that’s what the recipe said to do, though I think I baked mine for more like 18-19 minutes).  During these loonnnggg 15-17 minutes, I sat in my kitchen and smelled the delicious aroma of baking bread, cinnamon, orange, and vanilla.  It’s almost as good as actually eating the conchas!  Then, to pass the time, I took out a small pot and warm up some soymilk.  In a mug, I mixed together a spoonful of unsweetened cocoa powder with an equal-sized spoonful of turbinado sugar and and the same amount of soymilk, to form a paste.  Once the soymilk on the stove was warm, I poured it into the mug containing the chocolate paste, and mixed again until everything was well combined.

By this time, the conchas were done.

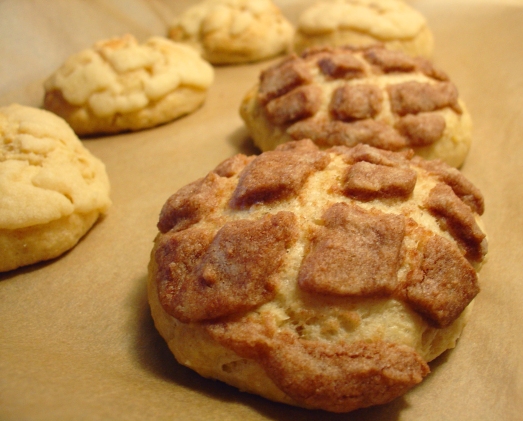
Conchas!

Cinnamon, vanilla, and orange conchas.

First, before doing anything else, I just sat and admired them.  They’re beautiful.  And they smell wonderful.

Then, I took one off the pan, put it on a plate, and sat down with my mug of hot chocolate.

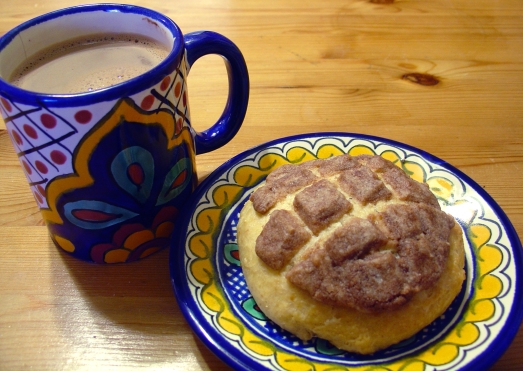
Concha with Hot Chocolate

Pan dulce con chocolate!

I took a bite.  I sighed.

It’s settled.

I can continue being a vegan.  As with everything else, these conchas are even more satisfying than the kind from a panadería, because I know exactly what went into them, and I did it all myself.  And, they’re delicious.

(*Some of the modifications I made may have contributed to a slight texture difference.  The recipe called for all AP flour, instead of the mixture with whole wheat pastry flour.  Also, the recipe said to use egg replacer, (like ener-g egg replacer) but I prefer to use the flaxseed mixture, which also may have contributed to a slightly less smooth texture than traditional pan dulce, as well as a slightly “healthy” taste.  The texture was surprising at first, but after I finished eating the first concha, it didn’t bother me at all, and I might even increase the whole wheat pastry flour next time I make these.)

One Hundred and Eleven Apples

One hundred and eleven apples.

That is how many apples were recently massacred in a medium-sized town in the desert, and turned into applesauce.  One hundred and eleven apples.

It would have been one hundred and twelve, but one of the apples was bad.  One bad apple out of one hundred and twelve.  That’s a 99.1% apple success rate.

It all started when a friend called me up the other day and suggested that we make applesauce.  I like apple sauce, I’ve been using it a lot recently in baking, and I love a nice warm bowl of applesauce when the weather is cool.  I decided that the applesauce sounded like a good idea, and agreed to join in on some apple festivities.

Little did I know that when my friend said “make some applesauce,” she really meant “make 51 cups worth of apple sauce.”  (Well, actually probably more like 60 cups, but more on that later.)

I arrived at my friend’s house to find one hundred and twelve lovely organic Costco apples.  She reassured me that we didn’t have to make them all into applesauce.  In fact, she wanted to keep one flat of apples (14 apples) for her and her husband to eat throughout the next two weeks.  I accepted that, and we began the process.  (It turns out that she was a big liar.  We used ALL of the apples.)

First, we washed the apples.  Then, we peeled the apples.  I, unfortunately, seem to be a klutz with the apple peeler, and could not remove any skin from the apple.  I decided to try just doing it with a knife, and that went even worse.  In the end, I peeled zero apples, and my friend peeled one hundred and eleven apples.

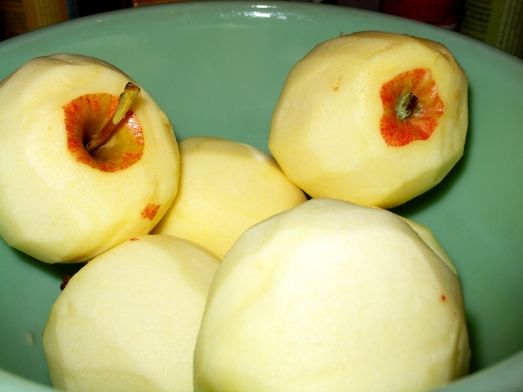
The apples are NAKED!

The apples are NAKED!

She was very good at it and wins the award for most apples peeled by hand in one day, within my presence.

Apple peels - Nature's own crunchy snack!

Apple peels - Nature's own crunchy snack!

I on the other hand became an expert at slicing the apples into quarters and cutting out the core.  I’ve had a lot of practice with this, seeing as how I eat apples almost every day, and usually slice and core them ahead of time for easy snacking.

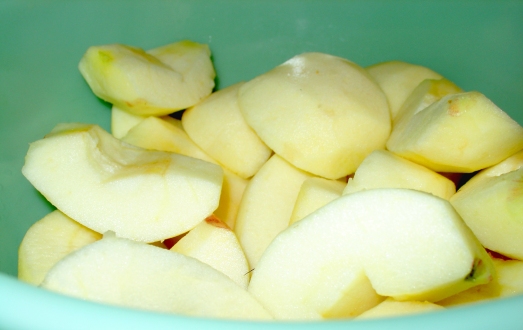
Quartered and Cored Apples

Quartered and cored apples - My personal contribution.

I got so good at this.  I’m thinking of going pro.

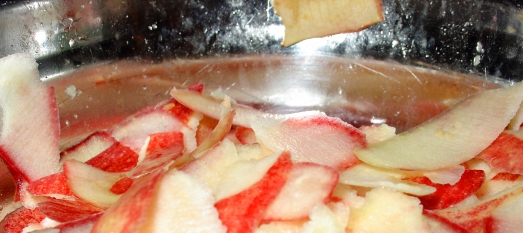
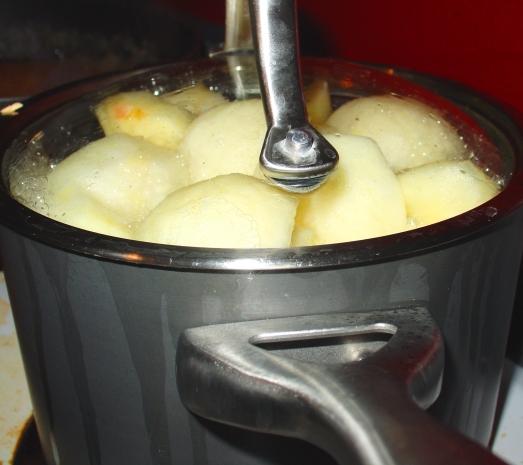
Next, we put the apples in a pot with a little bit of water, brought it to a boil, and then let them simmer for a long while.  Somehow, magically, the apples turned from looking like this:

Apples in a Pot

Apples in a pot.

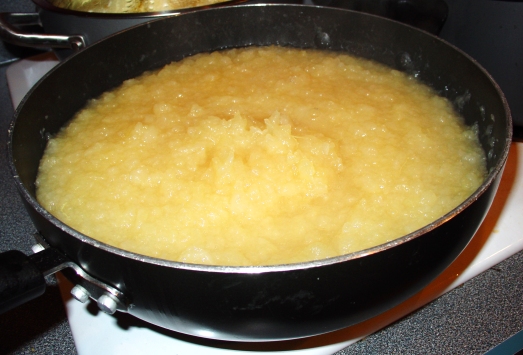
To looking like this:

Applesauce?!

Applesauce?!

We did very little to help the apples turn into applesauce.  There were no mashers involved, no blenders, no food processors.  We did use a whisk to mix the apples,and that helped them to mush up a bit.  But really, in the grand scheme of things, once we finished peeling and cutting and coring, the apples did all the hard work themselves.

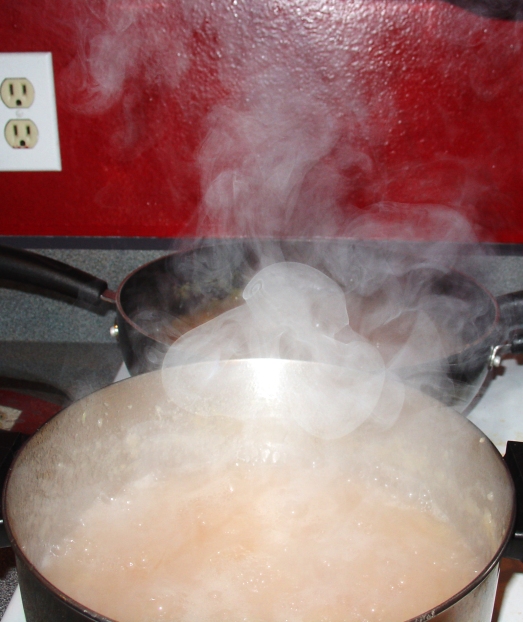
Though…when I studied one of my photographs…I am inclined to think that there was some sort of applesauce ghost involved in the process.  Look!

The Ghost of Applesauce Past, Present, and Future

The Ghost of Applesauce Past, Present, and Future

Do you see right there in the middle of the boiling apple steam?  I think that is The Ghost of Applesauce Past, Present, and Future.  I think the Applesauce Ghost helped to mush the solid apples into post-dental-work friendly applesauce!

Since we were making eighteen thousand pounds of applesauce, we decided to can it instead of just freezing it.  (Which is a good thing because my freezer is already full of homemade food!)  This was my first canning experience, but my friend had done it once before.

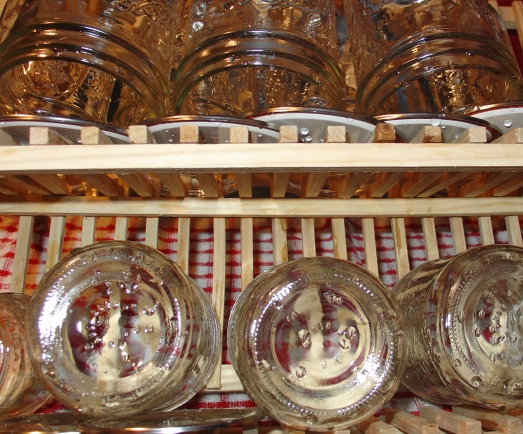
Mason Jars

Mason Jars

The jars are so cute.  I felt like I was ready to go build a house out on the prairie, with all the wholesomeness of cutting apples by hand, boiling them, and then canning them.  I hope we did it correctly, otherwise we’ll soon have 51 cups of poisonous applesauce.

We did pretty well considering this was our first experience with mass-produced apple sauce.  I made applesauce when I was little with my grandparents, but I don’t think we ever made nearly this much.  Aside from that, we always just froze it, which removes the time-consuming step of boiling the jars.

Despite our success, we did have one small failure.  Or, not a failure so much as a roadblock to complete success.

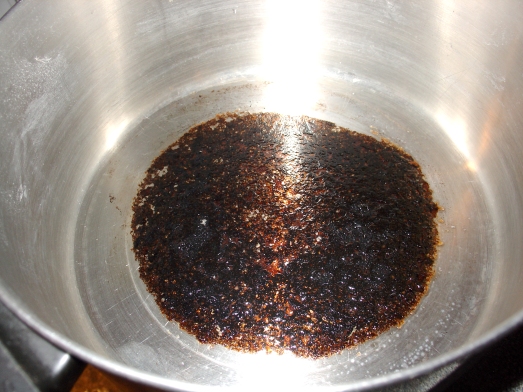
Applesauce Pot Casualty

Applesauce pot casualty.

One pot of applesauce did not survive.  Even after a good soaking and scrubbing, the pot still had a massive scar.  The entire contents of the pot got thrown away.  Had this pot not suffered a severe burning, we probably would have had about 60 cups of applesauce altogether, in the end.  But, the loss of a few cups of applesauce in contrast with the overwhelming success of the remaining cups isn’t a huge disappointment.  We still had plenty of applesauce.

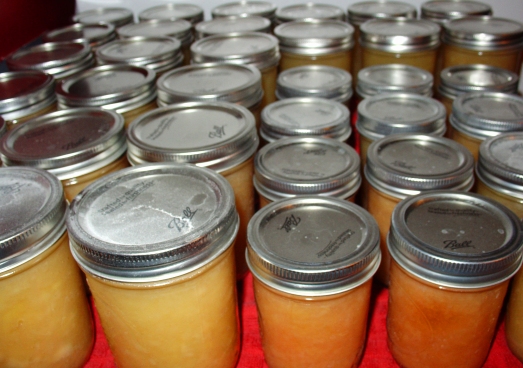
Rows and rows of applesauce.

Rows and rows of applesauce.

Rows and rows of applesauce.

So much applesauce.

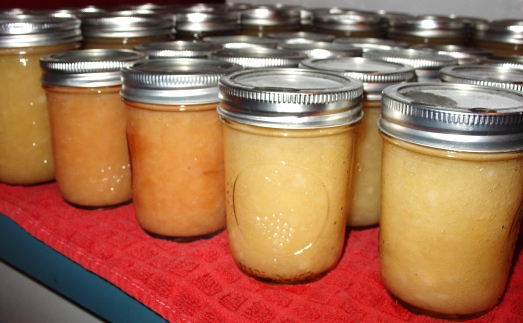
More applesauce.

Jars and jars of applesauce.

So much applesauce.

I am the newest member of the Chickpea Cutlet Fan Club!

So, I finally succumbed to the hype, and made The Post Punk Kitchen’s Chickpea Cutlets.  (I actually made the Doublebatch of Chickpea Cutlets, even though it was my first attempt, because the hype was so positive.)

Upon reading the recipe on The PPK, my hope was that these would taste something like the Morningstar Farms Chik Patties or the Boca Chik’n Patties.  I had long had an embarrassing obsession with these (I think I liked the Morningstar ones more, but I could never really remember, so I always just bought whatever was on sale.)  Since going vegan and working to eliminate chemicals and preservatives from my eating habits, I haven’t bought these “vegetarian junk food” items, as my roommate and I used to refer to them.   In my pre-vegan days I would cook up one of those chick’n patties and top it with tomato sauce and cheese and have a lovely little veggie chick’n parmesan.  Or, I would put on some salsa, jalapeños, and cheese, slice it up, put it in a tortilla, and serve it up Mexican style.  Or, I’d mix together some honey and mustard, and serve it with a honey mustard sauce.  Or, I’d put on catsup and mustard and eat it on a pita like a chick’n sandwich.

In the past, I’ve sort of had possibly unhealthy streaks of chick’n patty overdose.

Now, though, I was ready to move on and be a healthier person.  I was ready to try the famed Chickpea Cutlets.  They’re originally from Veganomican, but I used the recipe off the website (see above).  Of the 167 comments posted about the recipe, nearly all of them are positively glowing.  Much like when I made the heavenly delicious Mac and ‘Shews recipe a few months ago, I didn’t believe that the hype could be true.  But, much like 234 commenters couldn’t be wrong about the Mac and ‘Shews, those commenters erecting monuments in honor of the Chickpea Cutlets are pretty much right.  The Chickpea Cutlets are a winning food all around (unless you can’t eat gluten, sorry.)

These delicious patties are made mostly of chickpeas, vital wheat gluten, veggie broth, and spices.  That’s it.  So quick, so easy, so perfect.

I do have to admit that I had a bit of trouble, though.  The recipe says to mash the chickpeas, which I tried to do, but I don’t think I mashed them enough.  When it came time to mix everything together, the chickpeas had a really hard time incorporating into the rest of the dough.  This was such a problem, that I ended up loosing a good deal of them in the process – I just could not get the chickpeas to mix in with the rest.  When I divided up the dough to make into patties, I ended up with about 1/2 cup (maybe more) of chickpeas sitting sad and alone at the bottom of my mixing bowl.  Next time I make these (and there WILL be a next time, probably really, really soon), I will make sure to smoosh the chickpeas even more.  Hopefully that will help them to incorporate into the dough more fully.

Also, instead of pan frying the patties, I baked them in the oven.  They came out absolutely lovely and delicious.  (I sprayed the baking sheet with olive oil, then sprayed the top of the patties with olive oil, too.  I flipped the patties after about 20 minutes, and let them cook ten more minutes after that.)  I should add, though, that when I say “lovely,” I simply mean that they weren’t burned and they tasted good.  They weren’t quite round, or oval, or any recognizable shape.  But they tasted like I wanted them to, and that’s what mattered.

As luck would have it, I think I have finally found my homemade substitute for those preservative-laden store-bought chick’n patties.

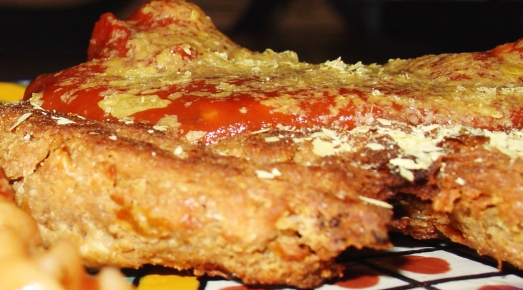
Chickpea Cutlet

Close up of the chickpea cutlet.

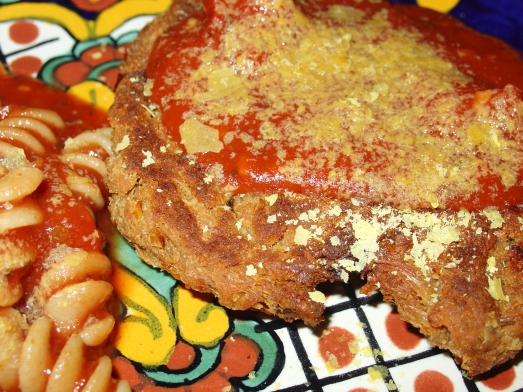
I didn’t get any pictures of the chickpea cutlets alone, but that’s okay.  They are pretty boring looking.  Here, though, is a close-up of a chickpea cutlet covered in tomato sauce and nutritional yeast.  So yummy!

Chickpea Cutlet Parmesan

Zoomed out a bit, with a view of some pasta beside the chickpea cutlet.

I usually don’t eat much pasta, but I made an exception here.  I felt that a chickpea cutlet just begged to be eaten beside some whole wheat pasta, with everything drowned in nutritional yeast.  (And really, who am I to deny the chickpea cutlet what it wants?)  It was good!

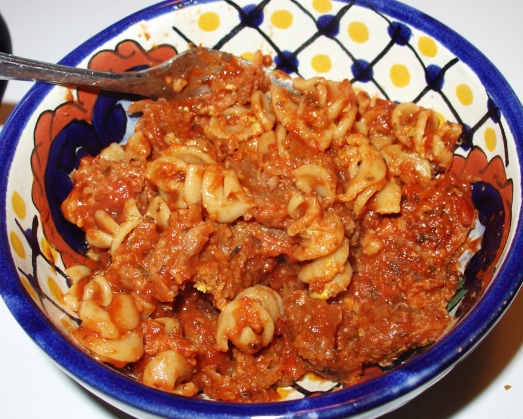
Perhaps I became a vegetarian all those years ago because I just didn’t like having to cut meat.  One of the selling points of the chickpea cutlet for many people is that you need to eat it with a steak knife.  Well, I don’t want to eat it with a steak knife.  I’d rather eat it with a fork and nothing else.  So, I tore a chickpea cutlet into bite-sized pieces and mixed it in with some pasta and sauce (and a good dousing of nutritional yeast).  This method worked wonderfully.  No knife, no fuss!

Chickpea Cutlet in Pasta

Pre-cut chickpea cutlet with pasta.

The next day for lunch I had my last serving of Mac and ‘Shews that I made months ago and froze in individual containers.  I though, ‘why not tear up a chickpea cutlet and add it to the Mac and ‘Shews?!’  So I did, and it was perfect.

I also ate a chickpea cutlet with catsup and mustard in a pita bread.  Delicious.

I had half of a leftover sweet potato sandwich that I was going to eat.  I wondered what would happen if I added a chickpea cutlet to the sandwich.  So, I tried it and it was great!

I would like to officially become a member of Chickpea Cutlet fan club.  I plan to make them many more times, and devise many more ways to eat them.

It really does look like fall outside today.

In honor of Veteran’s Day (as a public school teacher, this means a day off of work) and the fact that it is actually cool and cloudy in the desert, I woke up wanting pancakes.

I rolled over in bed, and grabbed my copy of Vegan Brunch (from its special place on my bedside table).  I flipped through to the pancake section, and there I saw it.  A recipe for Pumpkin Pancakes.  It called for 3/4 cup of pumpkin puree, which was perfect since I had 3/4 cup left over from last weekend’s Chocolate Pumpkin Nut Muffin extravaganza.  I looked through the rest of the ingredients, and, wonder of wonders, had all of them!

Then, I read through the narrative (because Isa always gives great narrative along with her recipes) and saw that she suggested making a Ginger Cranberry sauce to accompany the pancakes. Again, due to some sort of recipe magic, I had all the ingredients required for the sauce!  (Every autumn, when cranberries are sold constantly everywhere, I buy up about four bags to keep in my freezer.  One year, I needed cranberries for an activity with my students in February and I couldn’t find them ANYWHERE!  Ever since then, I have vowed to be well prepared when it come to cranberries.)

I started with making the Ginger Cranberry Sauce.  It begins with a basic cranberry sauce recipe (cranberries, water, sugar.)

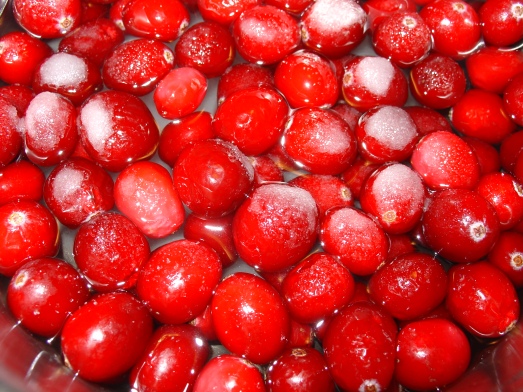
Cranberries

Cranberries are so bright and cheerful!

Then, you end up adding ginger and maple syrup.  I failed to take a picture of that.  But don’t worry, you’ll see the whole thing in a minute.

Next, I started with the pancakes.  Instead of all purpose white flour, I used whole wheat pastry flour (or, like, 95% WW pastry flour.  I ran out and needed to use a little bit of AP flour).  I also upped the pumpkin spices a bit (cinnamon, nutmeg, ginger, cloves).  Aside from that, I followed the recipe as written.

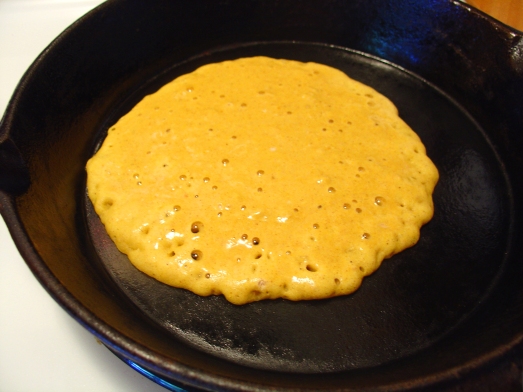
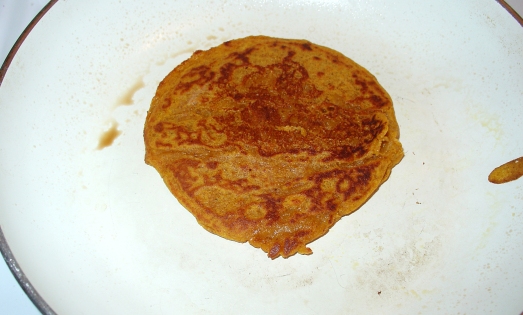
So, my first pancake started out looking adorable.

Pancake Cooking 1

Cute little pancake.

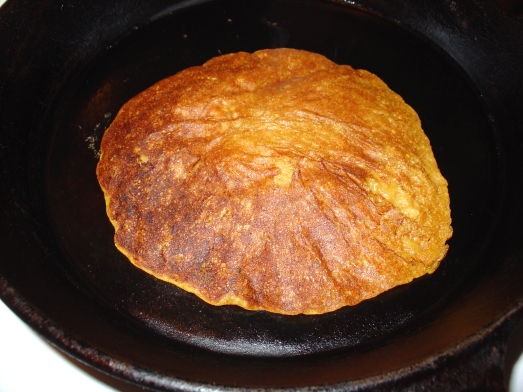
I flipped it and thing were still going okay.

Pancake Cooking 2

Flipped pancake, still pretty cute.

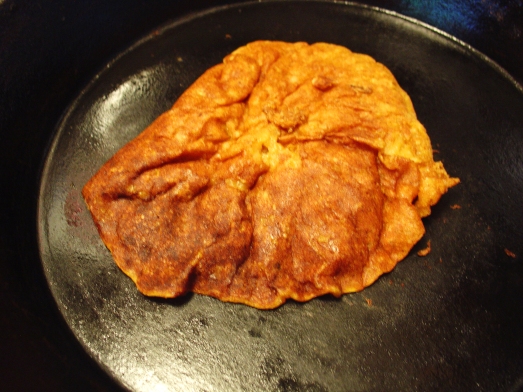
But then when I tried to get it off the pan, something weird happened.

Pancake Cooking 3

Weird wrinkled pancake.

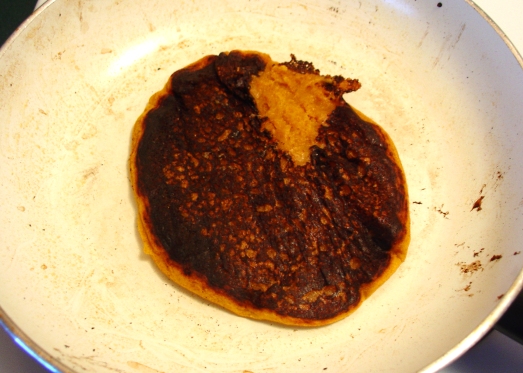
I figured it was just “first pancake” syndrome, and went on to make the next pancake.  Unfortunately, the next pancake looked like this:

Pancake Cooking 4

Charred pancake. Not quite deliciousness.

I lowered the temperature and tried again.

Pancake Cooking 5

I don't even know what happened here...

I was about to give up, but decided to try a different pan, a newfangled ceramic pan.  Maybe they just didn’t like the cast iron (although the recipe said to use cast iron).

Pancake Cooking 6

Things are starting to look up for my pumpkin pancakes!

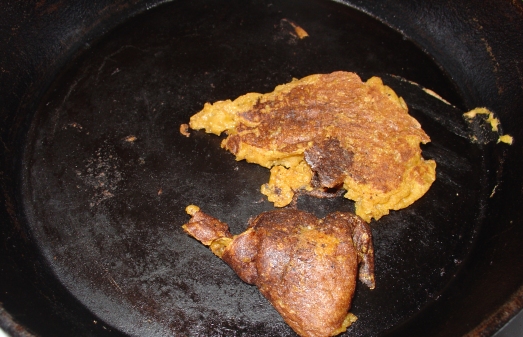
Unfortunately, by the time I got to the last pancake, things were still quite unreliable.  And this happened:

Pancake Cooking 7

Basically, I'm a pancake failure.

I’m not quite sure what I was doing wrong with the pancakes.  The outsides kept burning while the insides were super mushy.  They tasted good, and since there wasn’t any egg, I wasn’t worried about salmonella with them being unevenly cooked.  I just am not sure what I was doing wrong.  (I kept increasing and lowering the temperature.  Nothing quite helped.)

In the end, I did have a pretty delicious fall pancakey cranberry-y breakfast.  Afterward, I was stuck in a pretty severe pumpkin pancake coma, and couldn’t seem to get up to get dressed and get on with my day.  That was an unfortunate side effect.

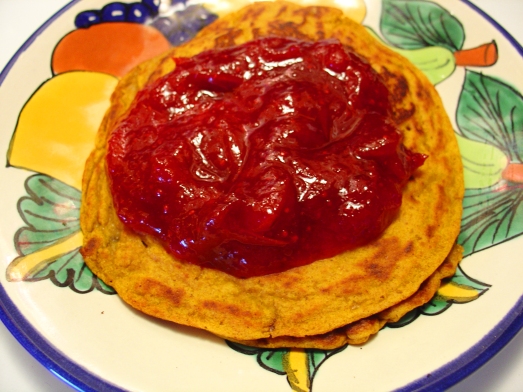
Final Pancake

Cute little pancake with delicious ginger cranberry sauce on top.

The sauce was really delicious, and aside from the second pancake (the super burned one), all the others seem to be edible.  In the cooking process, I ate two pancakes (they were just too destroyed to eat on a plate!) and afterward I ended up eating three with the sauce.  So, I think I’ve had my pumpkin pancake fill for the day.

Happy cloudy day.