I’m in Vegan Tamale Shock!

Let me start with this statement: I love tamales.

(Hopefully that will serve to explain the existence of this long, rambling post.)

As with mole and pan dulce, the first time I can remember having eaten a tamale is August of 2006, in Mérida, Mexico.  In the state of Yucatán, (where the city of Mérida is located) tamales are slightly different than those you find at most Mexican restaurants in the US.  In Yucatán, traditional restaurants and cocina económicas (small restaurants or individuals who cook a different type of food each day of the week) sell a special variety of tamales, called vaporcitos.  Vaporcitos are cooked in banana leaves instead of corn husks, which give them a slightly different flavor.  Throughout my time in Mexico, Saturday was tamale day.  My host mom would go to a nearby cocina económica and bring me home two delicious tamales.  They were so flavorful and moist that I didn’t even add sauce to them, except for a little bit of super-spicy salsa de chile habanero.  (I should add that, during my semester in Mexico, I temporarily took a break from eating vegetarian, which I was at the time, so that my host family wouldn’t need to make me my own special meat-free food.)

Since then, I’ve tried vegetarian tamales at Mexican restaurants.  I never liked them much because they were drowned in sauces and cheese.  I did quite enjoy Trader Joe’s Cheese and Green Chile tamales, before I decided to start eating vegan.  However, these very cheesy tamales tasted nothing like the tamales I remembered from Mérida, which had been filled mostly of some sort of meat and sauce.

So, when I saw recipes for vegan tamales in Terry Hope Romero’s Viva Vegan, I was excited.  Not just a little bit excited, but very excited.  Very, very excited.

It took me a while to work up the cooking-confidence to give it a try, but that time finally came.

Of the several varieties she has recipes for, I chose to make the Red Chile-Seitan Tamales.  These tamales, she said in the book, would fairly closely resemble traditional red chile tamales.  Cooking the tamales actually required four different recipes, all from Viva Vegan.  First I made the Steamed Red Seitan (to act as the meaty filling).  Then I made the Red Chile Sauce.  Next, I prepared the Savory Vegan Masa Dough.  Last, I was ready to follow the directions for the tamales themselves.  It was a multi-day, many-hour process.  But in the end, I can unequivocally say that it was worth it.  These tamales may be the most delicious things I have ever eaten.

This post is going to be image-heavy, because tamales are beautiful.  Unfortunately (or perhaps fortunately, I’m not sure), I dropped my camera and ended up loosing some pictures.  (And, by dropped I actually mean: walked into the cord attaching it to the wall while the battery was charging and ended up flinging the camera across the room and onto the floor).  The camera still works (it is a hearty little camera – approaching its eight birthday), it’s just that some of the files became corrupted during the camera’s failed attempt at flight.

Okay, onto the tamales.

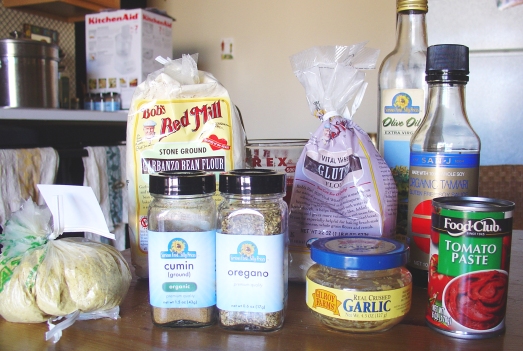
First, I made the Steamed Red Seitan.  While I had previously made seitan sausages, I had never just steamed a loaf of seitan to use in cooking.  I had bought the water-packed kind at the store a few times.  It was expensive.  I was ready to make my own.

Steamed Red Seitan ingredients

Steamed Red Seitan ingredients.

The ingredients are fairly basic (if you already happen to have vital wheat gluten and garbanzo flour, as I did).

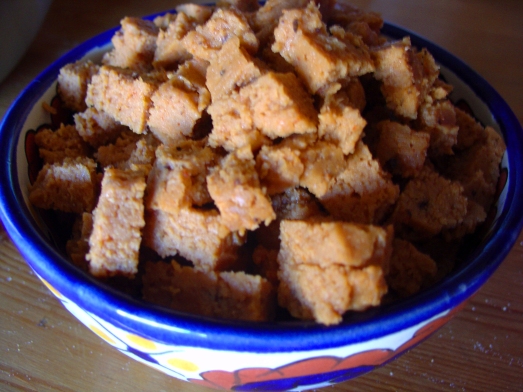
Cubed Steamed Red Seitan

Cubed Steamed Red Seitan.

After you mix it all together, knead it, wrap it in tinfoil, steam it, cool it, and cube it, it looks like any store-bought seitan!

Next, I made the Red Chile Sauce.

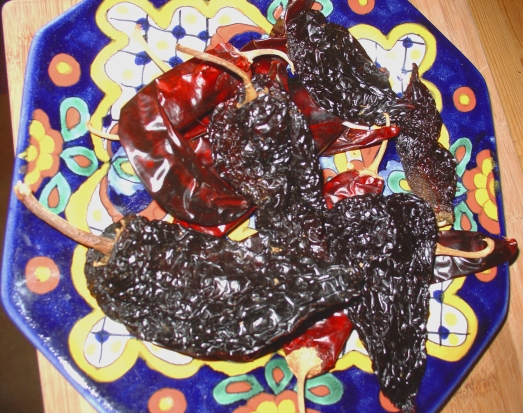
Dried ancho and guajillo chiles.

Dried ancho and guajillo chiles.

After removing the stems and deseeding the chiles, they were ready to be cooked together with onions, tomatoes, vegetable broth, and spices.

Red Chile Sauce, cooking.

Red Chile Sauce, cooking.

The next step was to puree the sauce.  Unfortunately, I did not heed the directions on my food processor, and filled the bowl much higher than the fill line.  There was sauce pouring out of every part of the food processor.  It was a pretty impressive mess, and I now know to not put liquids above the fill line on my food processor.

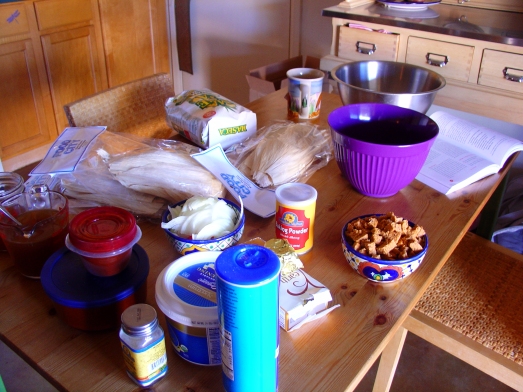
A few days later, I got ready to mix the masa and assemble the dough.  I was a little overwhelmed and basically just threw everything onto the table in a big mess of ingredients.

Tamale-making ingredients.

Tamale-making ingredients.

I have the broth, the vegetable shortening, the Earth Balance, the baking powder, the garlic powder, the salt, and the masa for the dough.  I have the sauce already made in the tupperware containers, and the seiten already made and cubed.  I have the onion and red peppers sliced and ready to saute for the filling.  I also have way too many corn husks.  (I wanted to be prepared!)  And, the most important part – the Viva Vegan cookbook!

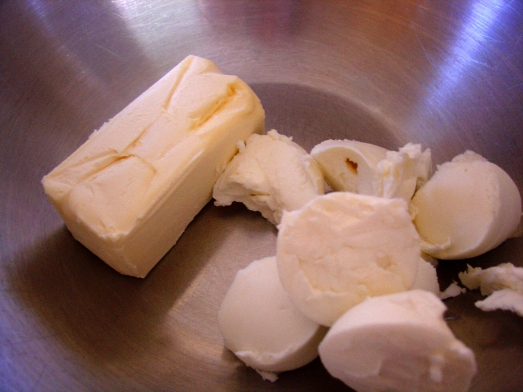
Earth Balance and vegetable shortening.

Earth Balance and vegetable shortening.

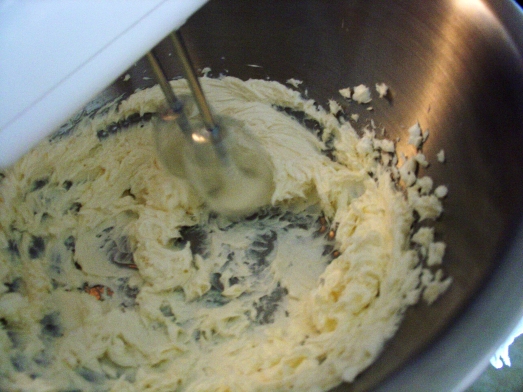
First, I started by creaming together the Earth Balance and the shortening.  Even though I use non-hydrogenated organic shortening, it still sort of grosses me out.  It’s just so greasy (which makes sense, since it’s oil…)

Creamed Earth Balance and vegetable shortening

Creamed Earth Balance and vegetable shortening.

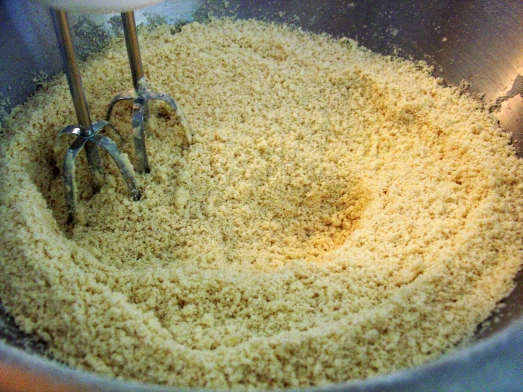
Then I added the dry ingredients to the creamed fat.

Dry Masa Dough

Dry masa dough.

After the dough reached a “sandy” consistency, I added the vegetable broth and mixed until smooth.

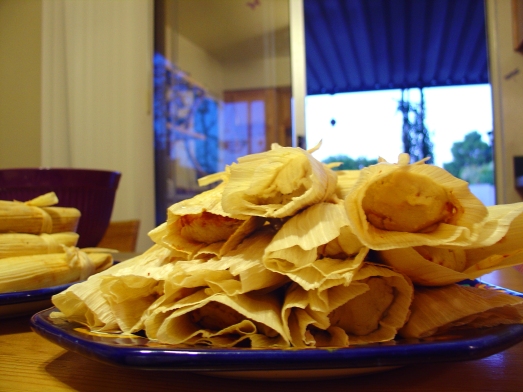
At this point, I had all the components ready.  All I had to do was assemble.  The assembly process was surprisingly easy, though it did take quite a while.  But it was enjoyable mindless work, and pleasant enough.  By the time I ran out of masa, I had 21 gorgeous tamales, wrapped in corn husks and tied shut with little strips of cornhusk.

Tamales, ready to be steamed.

Tamales, ready to be steamed.

After I finished wrapping the first tamale, I was flabbergasted that it actually looked like a tamale! Like, the kind you’d buy from somewhere.  And I had just made it.  From scratch! A real, live, (well, not live since no animals were harmed in the making of these tamales) tamale!

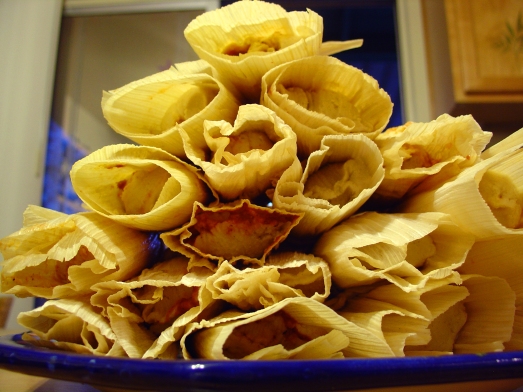
Tower of tamales.

Tower of tamales.

I started snapping photographs left and right.  These tamales have been more photographed than most celebrities.

Then, I lined the steamer basket with extra corn husks, and piled the tamales in.

Tamales: Moments before steaming.

Tamales: Moments before steaming.

My 21 tamales just fit in the steamer.  I think it’s a good thing that I didn’t make 24 like the recipe stated I should – I don’t know that they all would have fit!

The next thing I knew, 65 minutes were up, and the tamales were ready to be removed from the heat.  Then, after another excruciating 15 minutes, they were ready to be eaten.

I took one out of the steamer basket and laid it on a plate.

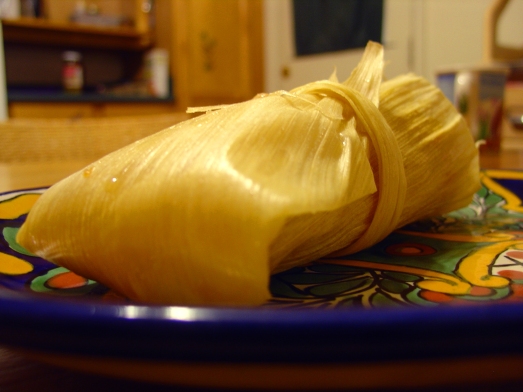
Tamale, still wrapped in corn husk.

Tamale, still wrapped in corn husk.

It still, surprisingly enough, looked like a tamale.

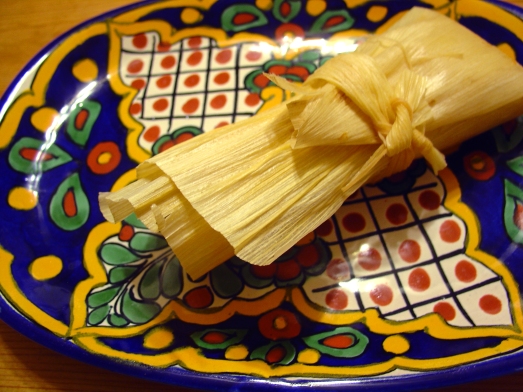
Wrapped Red-Chile Seitan Tamale.

Wrapped Red-Chile Seitan Tamale.

This tamale had a jaunty side-tied knot.

Wrapped Red-Chile Seitan Tamale, tunnel view.

Wrapped Red-Chile Seitan Tamale, tunnel view.

It’s like playing peek-a-boo with the tamale.  Or else, perhaps the tamale is going to jump out and attack.  I can hear the Jaws theme now… (Only, no shark would eat this tamale, because it’s meat-free!)

After all the dramatics of admiring the husk, I was ready to open it up and find out for certain if it had turned into a tamale.

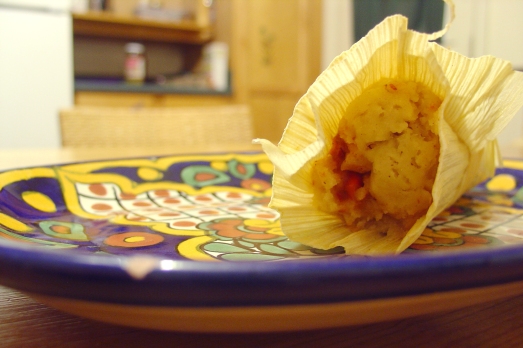
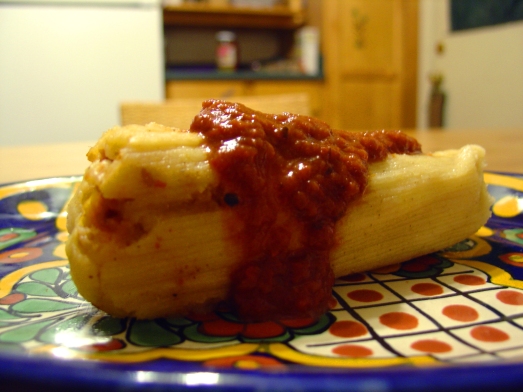
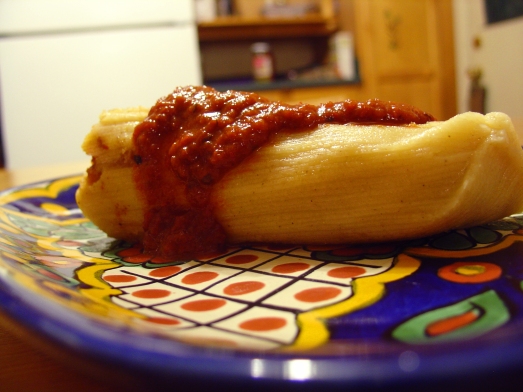
So, I cautiously opened it, and found inside, a perfectly formed tamale!  I poured on some more red chile sauce.

Perfect Red-Chile Seitan Tamale, angle one.

Perfect Red-Chile Seitan Tamale, angle one.

Amazing.

Perfect Red-Chile Seitan Tamale, angle two.

Perfect Red-Chile Seitan Tamale, angle two.

Fabulous.

So, at this point I knew that it looked like a tamale, and smelled like a tamale, but the biggest question was, did it taste like a tamale.

I will let this g-chat conversation, between me and my sister and occurring moments after I tasted my first tamale, answer that question:

Me: i just took a bite and it is SO GOOD. YUUUMMMMM
Sister: haha. nicee
Me: i want to eat all 21 RIGHT NOW.
Sister: you would not be happy
Me: no…i would not. but still. they taste like TAMALES!
Sister: good
Me: they taste like meaty tamales because of the seitan and spices. THEY ARE SO GOOD. i can’t believe it.
Sister: hah
Me: i’m in tamale shock. TAMALE SHOCK.
Sister: calm down. deep breaths
Me: i just finished the second one.
Sister: nicee
Me: i don’t ever want to eat anything else ever again. only these tamales.
20 minutes later…
Me: i just ate my third.

.

As you can see, I loved these tamales so much that apparently I forgot how to appropriately use capital letters. (And I’m a teacher. Teachers are always supposed to follow capital letter rules.)  While I was on a tamale high, my sister was substantially less impressed.  Of course, that’s only because she didn’t have any gloriously amazingly scrumptious vegan tamales to eat.

Overall, the tamales were quite a process.  They took a long time.  A long, long time.  They created a mess.  Quite a mess.  But they are delicious.  So, so, delicious.  They are sweet and meaty and saucy and masa-y and everything else that tamales should be.

I think the next tamales I make will be Chocolate Brownie Tamales.  I found the recipe on Terry’s (the author of Viva Vegan) website and they look great.  Chocolate and tamale?  They aren’t exactly traditional, and I never would have thought the two could be combined…but now that I know they can, I need to make them.  And I do have two extra bags of corn husks, along with most of a package of masa.  Look for pictures of these chocolate tamales within the next few weeks… I don’t think it will be long before these are made.

My ode to pan dulce

When I first became vegan, I was concerned about missing two things.

One, sort of obvious, was cheese.  I mean, cheese is kind of magical.  I had an obsession with string cheese.  There were some days when my consumption would reach three sticks of cheese.  I would buy these huge 48 packs of string cheese at the store and go through them quickly.  String cheese was the perfect portable protein source (love alliteration!).  It fit in a pocket, a purse, or a lunch bag.  I also loved to eat queso Oaxaca, which is closely related to string cheese/mozzarella cheese, but slightly different.  I first was introduced to it in Mexico, and found that you can buy it at any Mexican market here in the desert.  Aside from those cheeses, I also occasionally enjoyed a nice creamy goat cheese.  I guess my cheese love wasn’t wide, but it was deep.  However, interestingly enough, I haven’t craved cheese at all since I stopped eating dairy.  I also have absolutely no desire to try any of the vegan cheeses out there.  Any cheese-like concoction that I can create at home is good enough for me, right now.

However, in addition to the cheese, I was very concerned about missing Mexican pan dulce.  Pan dulce is an all-encompassing name for a wide variety of sweet Mexican pastries.  While there are a lot of different kinds of pan dulce, they are all bread-based, and they are all sweet (hence the name; pan=bread, dulce=sweet).  In many cases, the name of the pan dulce describes its appearance.   My favorite varieties of pan dulce were always las conchas (shells), las orejas (ears), and las banderillas (a dart stuck into a bull).  There is a panadería (bread store, or, Mexican bakery) near my work that I used to stop at every other Friday, or so.  I would buy three or four pieces of pan dulce, and eat them with hot chocolate or coffee throughout the weekend.  Just walking through the door of the panadería reminded me of my time living in Mexico, and the many wonderful panaderías there, ubiquitous on every major corner in the city.  Unlike bakeries in the United States, in Mexico you enter the panadería, you take a large metal tray and a set of tongs, and walk through the bakery smelling the breads and using the tongs to select what you want.  The panaderías in the US work the same way.  I’ve been to US panaderías in Chicago, Omaha, Rural Iowa, and Phoenix.  No matter where you go, there are the ever-present dented metal trays, the metal tongs, and the trays and trays of fresh, delicious, sweet-smelling Mexican pan dulce.  Sometimes, it’s a mystery as to what you’re buying.  The label might say that an empanada is filled with piña (pineapple), but when you take a bite, you discover that it’s actually filled with crema (sweet custard-like creme).  Whatever you end up eating, the pan dulce experience is always a sweet one. (Ha ha.  Get it?)

So, this is to say, that while cheese may have seemed like my biggest “sacrifice” when going vegan, in all actuality, it was really pan dulce.  The only times in four months that I have contemplated eating anything non-vegan were the occasional Friday afternoon as I was driving past the turn off to go to the panadería, or Monday mornings when I would go make photocopies at work, and be offered sweet pan dulce by the parents who volunteer at the school.  Cheese, I have never craved.  Pan dulce though, I’ve dreamed about.

So, I went on a search for vegan pan dulce.  No matter how I googled it, only one recipe appeared: Vegan Explosion’s Conchas.  This recipe was posted way back in 2008, but both the recipe and the photographs looked great.  So, I decided to give it a try.

I was so excited to finally eat pan dulce, for the first time in six months, that I measured out the dry ingredients the night before, so I could get right to work with the mixing and rising and making and baking and eating the next morning.

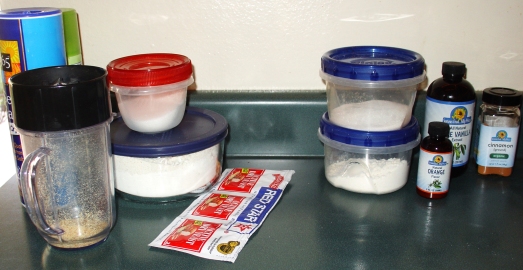
Pan Dulce - Pre-measured dry ingredients.

The ingredients on the left are for the dough, the ingredients on the right are for the topping.

I made a few modifications*, but mostly followed the recipe as posted on Vegan Explosion:

Ingredients for the dough:

  • 1 Tablespoon yeast
  • 2/3 cup water, warmed
  • 1/3 cup sugar
  • 1/3 cup non-hydrogenated vegan spread (like Earth Balance)
  • 1 teaspoon salt
  • 1 Tablespoon ground flaxseed + 3 Tablespoons water (since ground flaxseed goes bad so quickly, I always grind it myself in the Magic Bullet)
  • 2 1/2 cups AP flour
  • 1 cup whole wheat pastry flour
  • 1/2 cup lukewarm soymilk, warmed up and then cooled in the freezer for 3 minutes

To make the dough, I first dissolved the yeast in warm water, and mixed the ground flaxseed with water (these two mixings happen separately).  I allowed both to sit for a few minutes to do their thing.  (That is, the yeasties needed to wake up from their long slumber, and the flaxseed needed to get thick and gooey in the water.)  While the yeast and flax were busy at work, I warmed the soymilk on the stove.  Unfortunately, I got distracted and the soymilk burned and boiled over and made a mess.  I washed out the pot and tried again – the second time experiencing liquid-warming success.  As I put the soymilk in the freezer to cool, (I’m not sure what the reason for the warming and cooling are, but the recipe said to do this) I sifted together the flour, sugar, and salt, and poured in the Earth Balance, yeasty water, flaxseed mixture, and the now-cooled soymilk.  I mixed and kneaded everything until it was pretty smooth.  Then, I rolled it into a ball, put it on a piece of parchment paper, and covered it with an upside-down bowl.  I let it relax for about two hours.  (I would have done 1.5 hours, but my kitchen was pretty cold and I wanted to make sure it rose enough.)

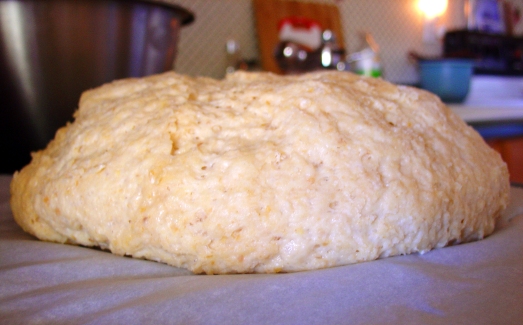
The dough that took over Manhattan.

The dough that took over the city. (Or my kitchen. Or maybe just that piece of parchment paper.)

Then, I punched down the dough, kneaded it a tiny bit, and rolled it into 12 balls which I put on two parchment-lined baking sheets.

Next, I prepared the topping.

Ingredients for the topping:
  • 1/3 cup sugar
  • 1/4 cup non-hydrogenated vegan spread (like Earth Balance)
  • 1/2 cup AP flour
  • 1 teaspoon cinnamon
  • 1/4 teaspoon vanilla extract
  • 1/3 teaspoon orange extract

I put the sugar, Earth Balance, and flour together in a bowl and mixed until they were well combined.  Then, I divided this mixture into three separate balls.  With one ball, I kneaded in the cinnamon until it was well incorporated.  With the next ball I kneaded in the vanilla until it seemed mixed in.  With the last ball I kneaded in the orange extract until it was well mixed.  (In the original recipe, it said to add a drop of red food coloring in with the orange flavored topping, but I didn’t have any food coloring, so my orange topping, like my vanilla topping, is white.  The cinnamon topping is brown.)

I divided each of the balls of topping into four tinier balls.  The original recipe said to put each ball between two sheets of plastic wrap, roll them flat under the plastic wrap, and then drape them over the balls of dough.  I, being too lazy to get out the plastic wrap and rolling pin, chose to just flatten each ball as best I could without having too much of the topping stick to my hands, and then draped these sort-of circles over the dough.  It was messy, but it worked out okay.

Finally, it was time to transform these from just balls of dough into real conchas.  I carefully used a knife to cut a shell pattern into the topping.  There are different ways to do it, but I just made three or four cuts in one direction, and then three or four more crossing over in the other direction.  Really, you can make any design or pattern you want.

I then covered the trays of dough and let them rise for another 40 minutes.

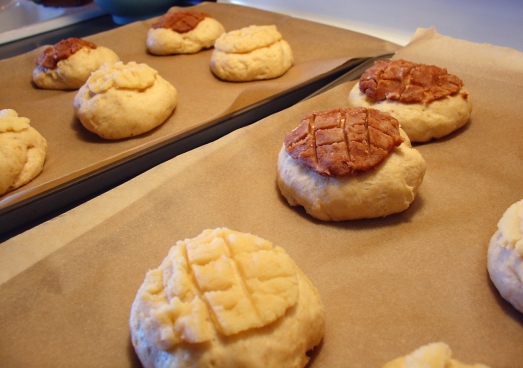
Pan dulce - risen and ready to go in the oven.

Pan dulce - risen and ready to go in the oven.

Then, into the oven for 15-17 minutes (that’s what the recipe said to do, though I think I baked mine for more like 18-19 minutes).  During these loonnnggg 15-17 minutes, I sat in my kitchen and smelled the delicious aroma of baking bread, cinnamon, orange, and vanilla.  It’s almost as good as actually eating the conchas!  Then, to pass the time, I took out a small pot and warm up some soymilk.  In a mug, I mixed together a spoonful of unsweetened cocoa powder with an equal-sized spoonful of turbinado sugar and and the same amount of soymilk, to form a paste.  Once the soymilk on the stove was warm, I poured it into the mug containing the chocolate paste, and mixed again until everything was well combined.

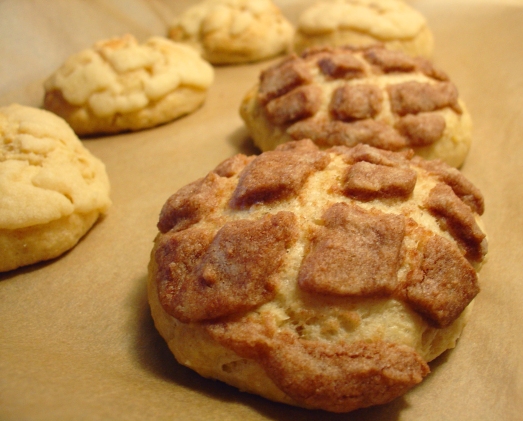
By this time, the conchas were done.

Conchas!

Cinnamon, vanilla, and orange conchas.

First, before doing anything else, I just sat and admired them.  They’re beautiful.  And they smell wonderful.

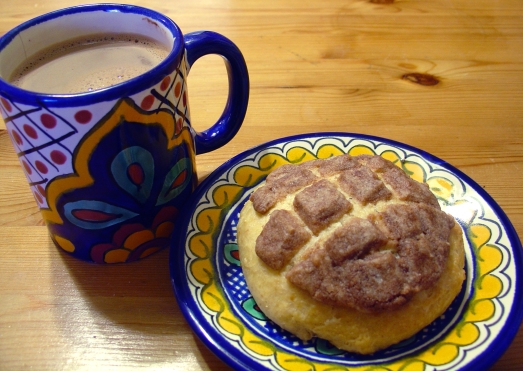
Then, I took one off the pan, put it on a plate, and sat down with my mug of hot chocolate.

Concha with Hot Chocolate

Pan dulce con chocolate!

I took a bite.  I sighed.

It’s settled.

I can continue being a vegan.  As with everything else, these conchas are even more satisfying than the kind from a panadería, because I know exactly what went into them, and I did it all myself.  And, they’re delicious.

(*Some of the modifications I made may have contributed to a slight texture difference.  The recipe called for all AP flour, instead of the mixture with whole wheat pastry flour.  Also, the recipe said to use egg replacer, (like ener-g egg replacer) but I prefer to use the flaxseed mixture, which also may have contributed to a slightly less smooth texture than traditional pan dulce, as well as a slightly “healthy” taste.  The texture was surprising at first, but after I finished eating the first concha, it didn’t bother me at all, and I might even increase the whole wheat pastry flour next time I make these.)

Vegan Mole Amazingfood

Twice so far, I have cooked Chili Sin Carne Al Mole from Vegan With a Vengeance.  This stuff is amazing.  AMAZING.  It is so incredibly delicious.  It has bits of chewy seitan, hearty beans (I used black instead of pinto as the recipe called for), sweet tomatoes, spicy jalapeño, and, of course, cocoa powder.

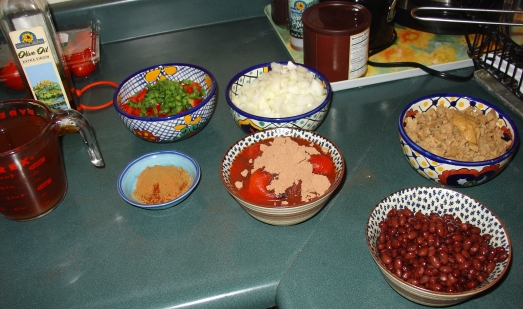
Vegan Mole Ingredients

It took me - no exaggeration - about an hour and a half to chop, measure, and divide this all up.

I first ate mole – real, delicious, sweet, spicy, mole in 2006 when I was living in southern Mexico.  I had a variety of Yucatecan mole, poured over chicken (I was eating meat temporarily at the time, to get the full culinary experience of Southern Mexico) and rice.  It was amazingly good.  I loved just eating spoonfuls of the mole sauce – the actual chicken I could take or leave.  My host mother at the time, explained to me how to make mole, and she made it seem really complicated.  (Though, maybe everything was a bit complicated for me in Mexico – I was learning a new culture and a new language all at once.)

This mole, though, isn’t bad.  I am, admittedly, the slowest cutter, chopper, or measurer around.  Sometimes, I just get distracted in the middle of chopping and leave the kitchen for a while.  But really, I am just very deliberate.  If the recipe calls for a “quarter inch dice” (or something along those lines – is a “quarter inch dice” even a thing?) you better believe that my dice is going to be pretty close to one quarter inch.  I read the recipe 3 times, measure twice, and add to the food mixture once.  (That was supposed to be a play on the “measure twice, cut once” saying that goes with wood work…)

So, despite the fact that it took me an eon and a half to prepare the ingredients, that’s all my fault, and not the fault of the ingredients or the recipe.  Up there in the picture, I have everything divided out so that I could just dump it in the pot when it was time.  First, I have the red peppers and jalapeño, next I have the onions.  After that I added the spices from the small blue dish.  Next came the seitan and garlic.  (I, as always, am lazy and use garlic-in-a-jar).  Finally came the  tomatoes and cocoa.  I ended with the vegetable broth and the beans.  After just simmering for a while (and letting it sit so that the flavors meld) I had an amazingly delicious vat of mole sauce filled with seitan, beans, and some vegetables.

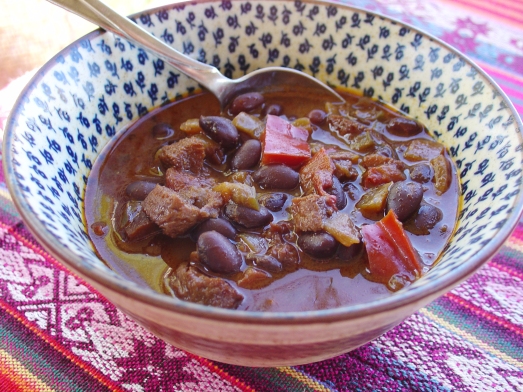
Chili Sin Carne Al Mole

A delicious bowl of chili sin carne al mole.

I wish you could smell through the computer screen – this stuff smells amazing, tastes wonderful, and is pretty healthy, too.  (It calls for 1/3 cup of oil, I think, but I reduced it to 1/4.  I probably could have done with even less.)

Close-up of Chili Sin Carne al Mole

Close-up of hearty deliciousness.

I usually post small photos on here, but this deserved a full-sized viewing.  You can see chewy chunks of seitan, hearty black beans, onions, red peppers, jalapeño peppers, chunks of tomato, and a sweet brownish-red broth of veggie stock, tomato, spices, and cocoa.

I just ate a bowl of this stuff, and already my mouth is watering looking at this picture.